Fleets
Fleets let you manage agent operations and configurations at scale.
Collectors inherit the configuration assigned to their Fleet and can join or leave Fleets without changing the Fleet’s configuration.
Fleets were built to address common scaling and management needs:
Grouped config management for sets of collectors
Label-based organization by environment, geography, workload type, etc.
Install-time assignment for container platforms using a Fleet label
What are Fleets?
Fleet configurations take priority over any individual agent configuration. This makes it easy to manage settings for many agents at once without having to update them individually.
If the fleet configuration is later removed or an agent leaves the fleet, the agent simply reverts to its fallback configuration. If no fallback configuration exists, it receives an empty configuration that does nothing. This means agents will continue running with a known configuration rather than being left in an undefined state.
Creating a Fleet
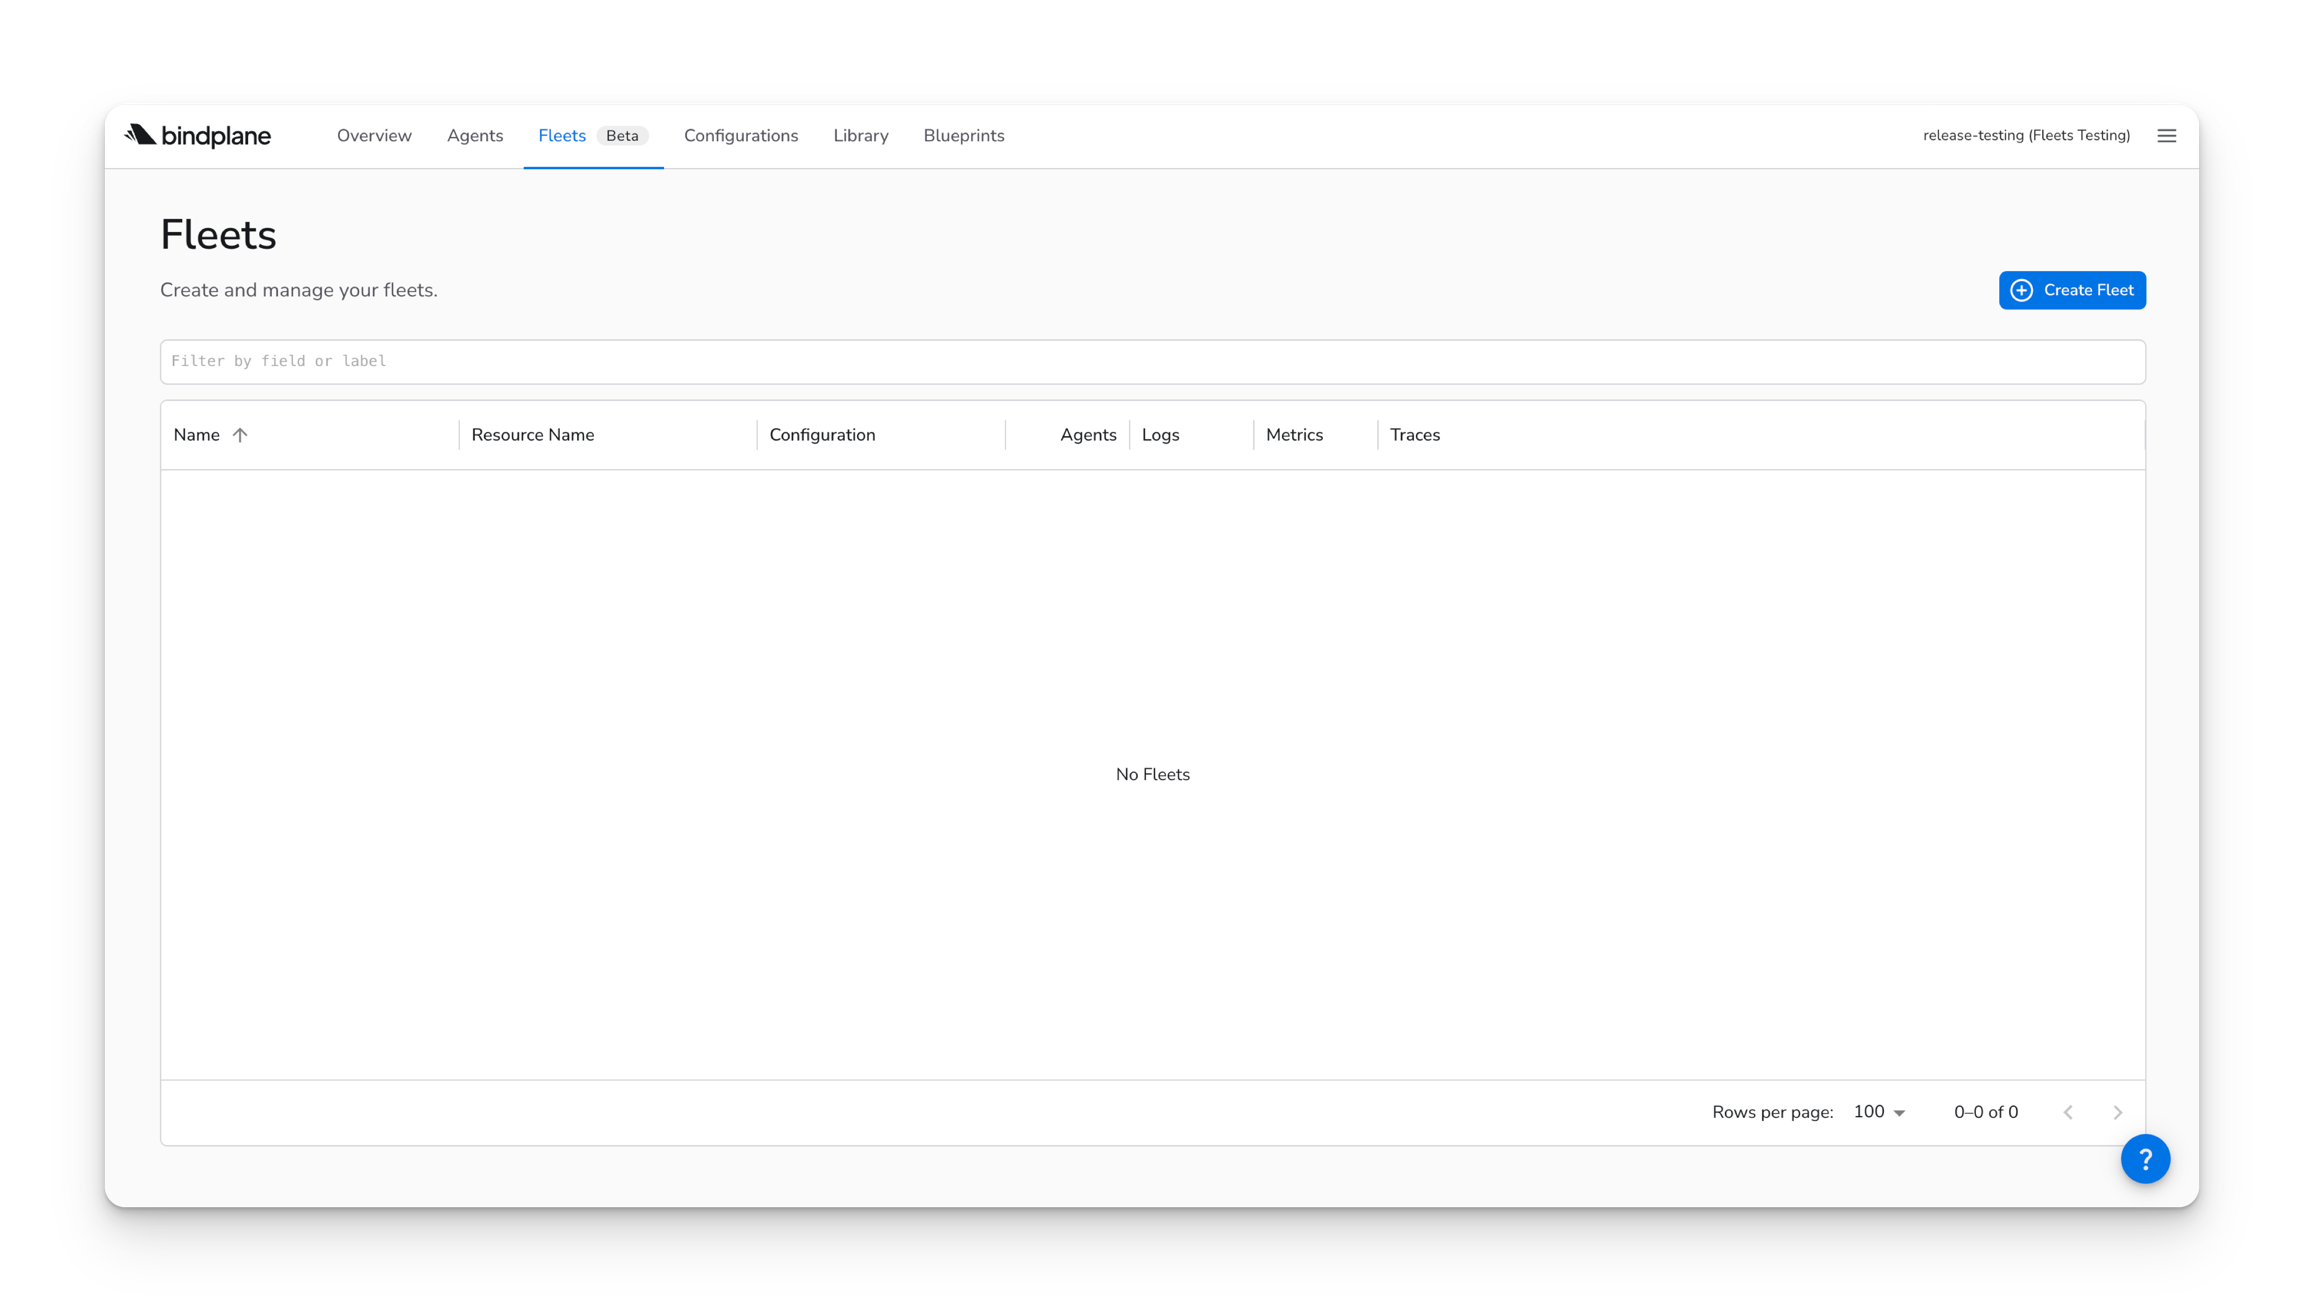
To create a fleet, go to the Fleets page and click Create Fleet.
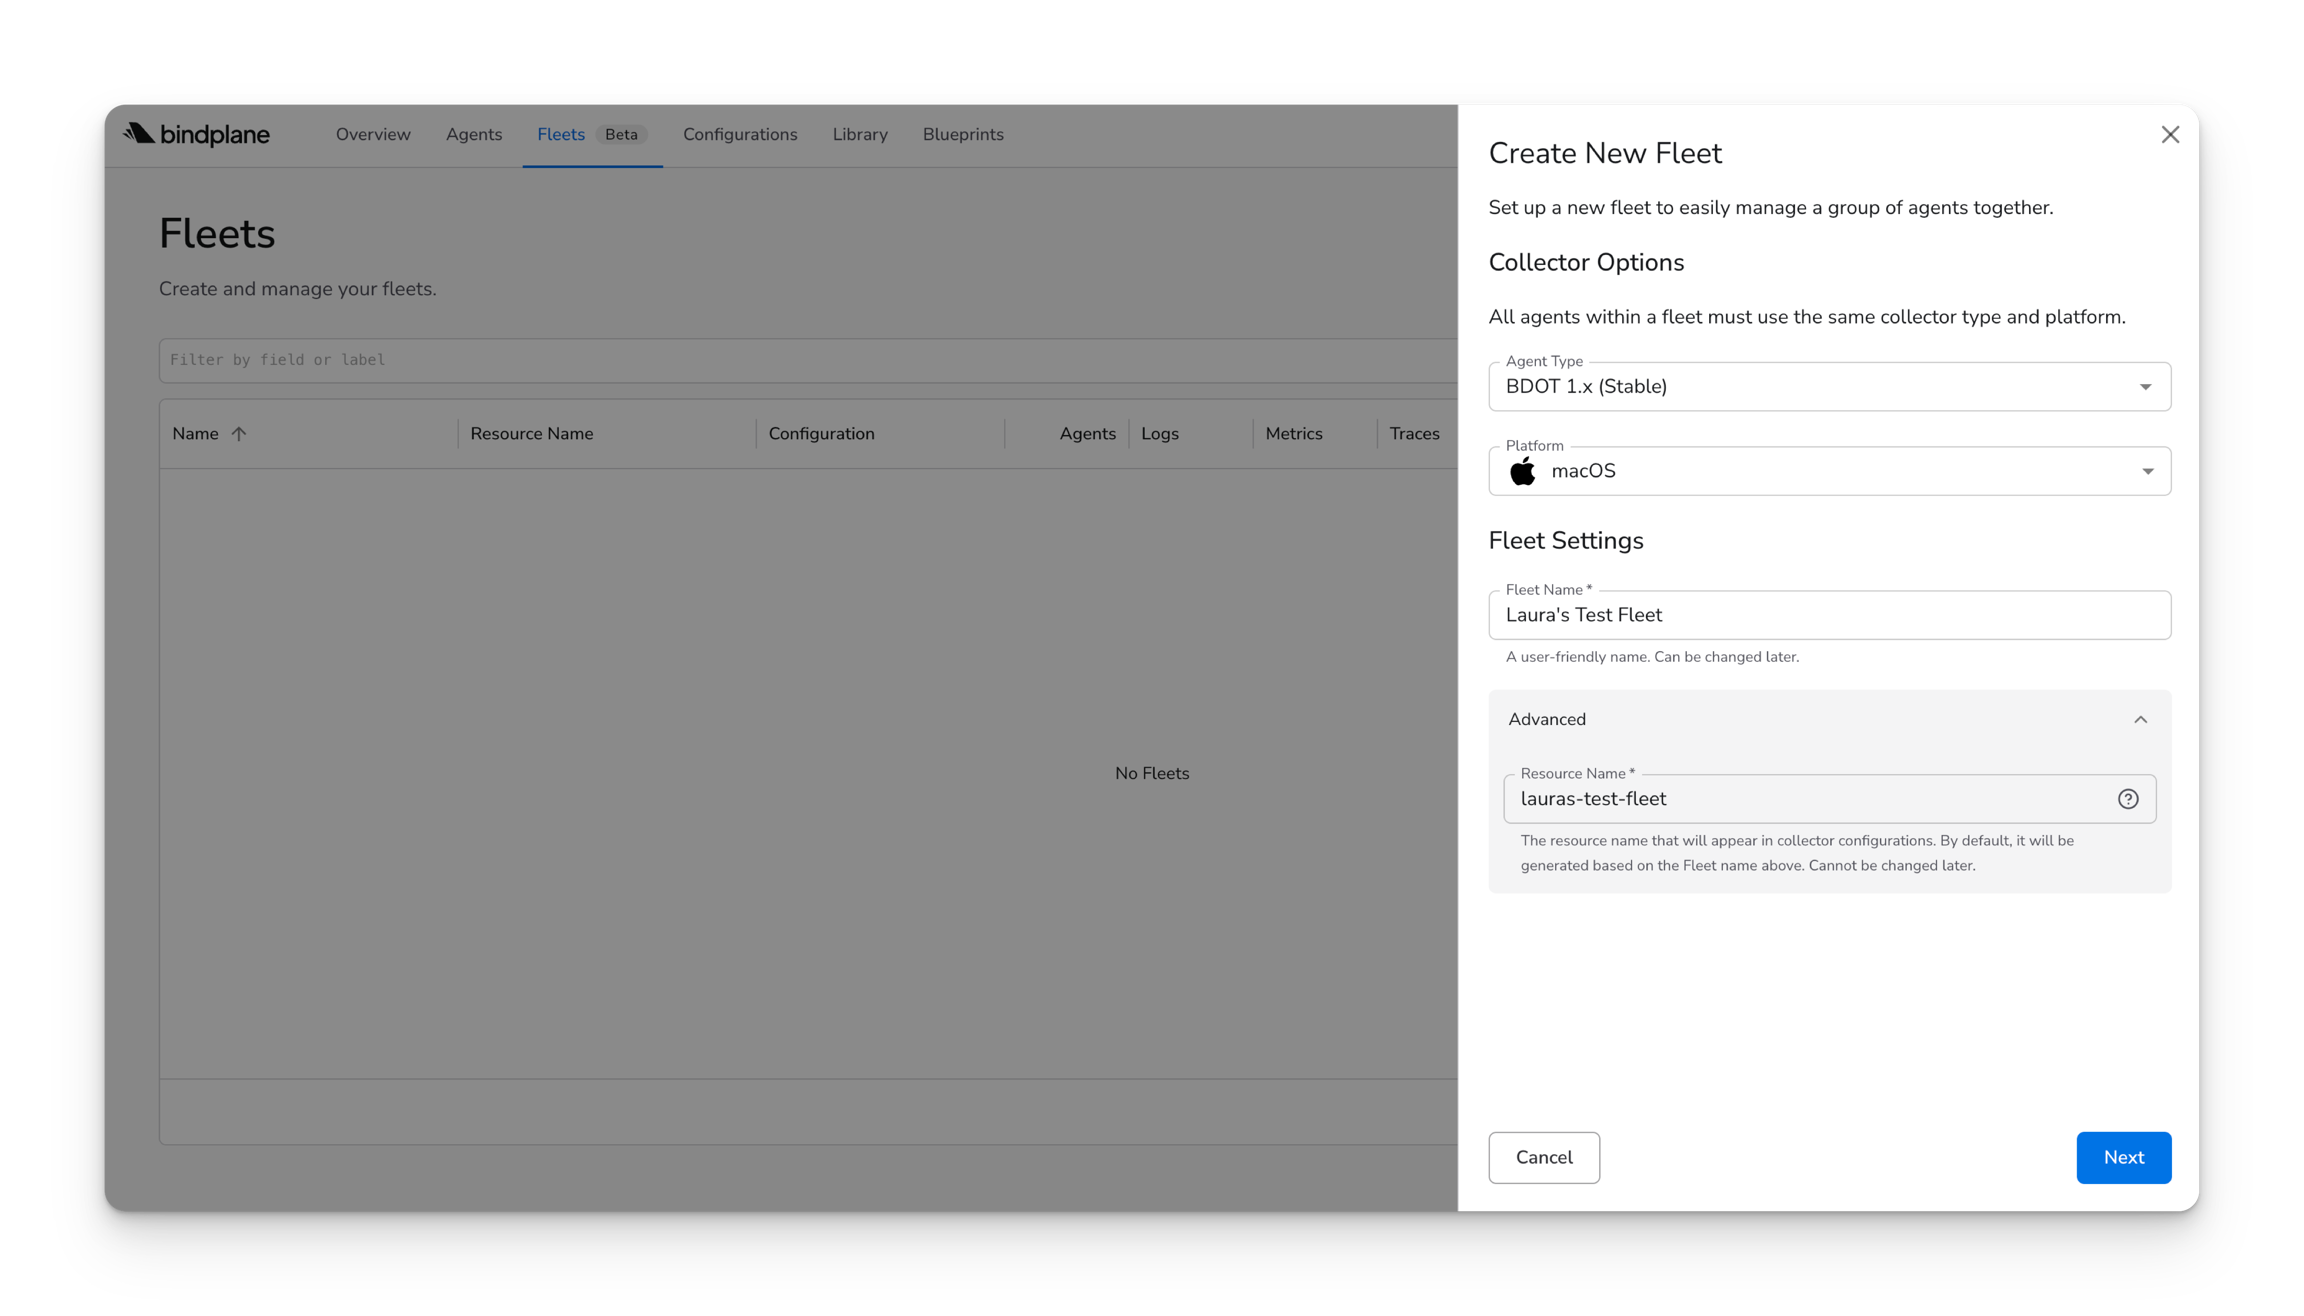
Select the agent type and platform and set a fleet name. (Optionally, you may specify a different resource name. This cannot be changed later.)
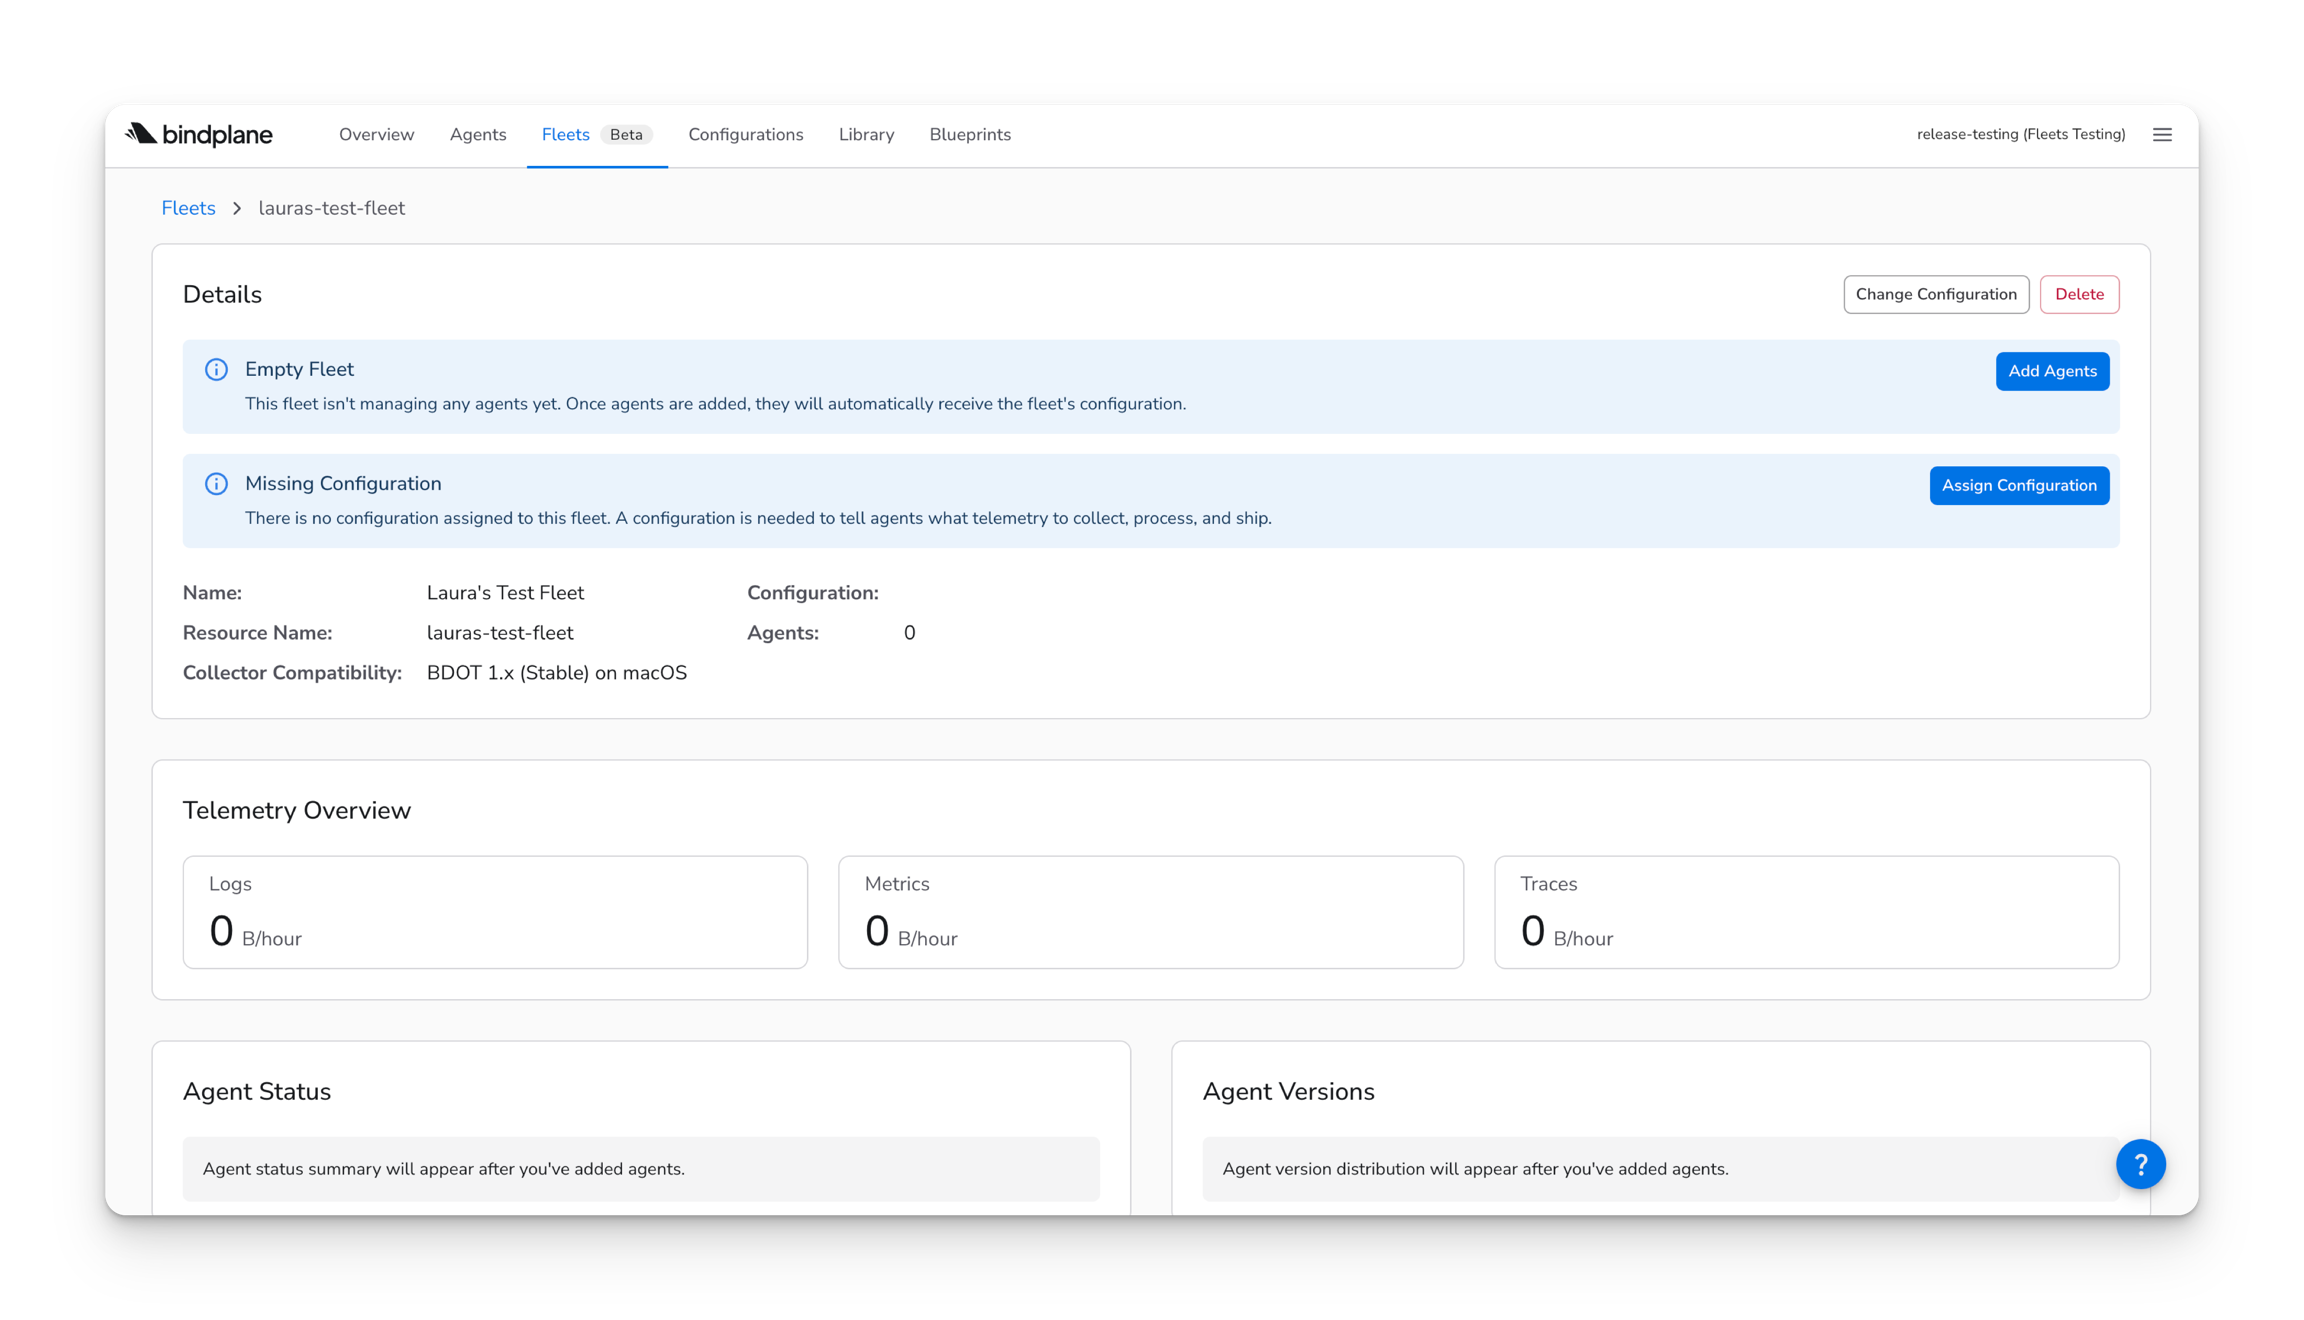
This creates an empty fleet to which you can assign a config or add agents.
CLI
Optionally, you can use the CLI to create a fleet. Define your fleet in a YAML file. Below is an explanation of the parameters.
apiVersion
The API version of the resource being used. All Fleet resources currently use bindplane.observiq.com/v1.
kind
Tells Bindplane what kind of resource it is dealing with. In this case, Fleet.
metadata.name
This is a unique identifier for your Fleet within Bindplane.
metadata.displayName
A friendly, readable name for your Fleet.
metadata.description
An optional description of your Fleet to provide additional information.
metadata.labels
Labels attached to the Fleet resource that define which agents can join the fleet. platform must match the operating system. agent-type must be observiq-otel-collector.
spec.configuration
The resource name of the configuration assigned to the Fleet. This may be empty and assigned later.
selector.matchLabels
Defines the matching rule for agents. In this example, agents with the label fleet=lauras-test-fleet will automatically be associated with this Fleet.
Apply the fleet. For example:
Make sure the API key used to make this request has permission to create a fleet (requires project admin or project user permission).
Adding Agents to a Fleet
From the Fleet page, select Add Agents and choose eligible agents from the list.
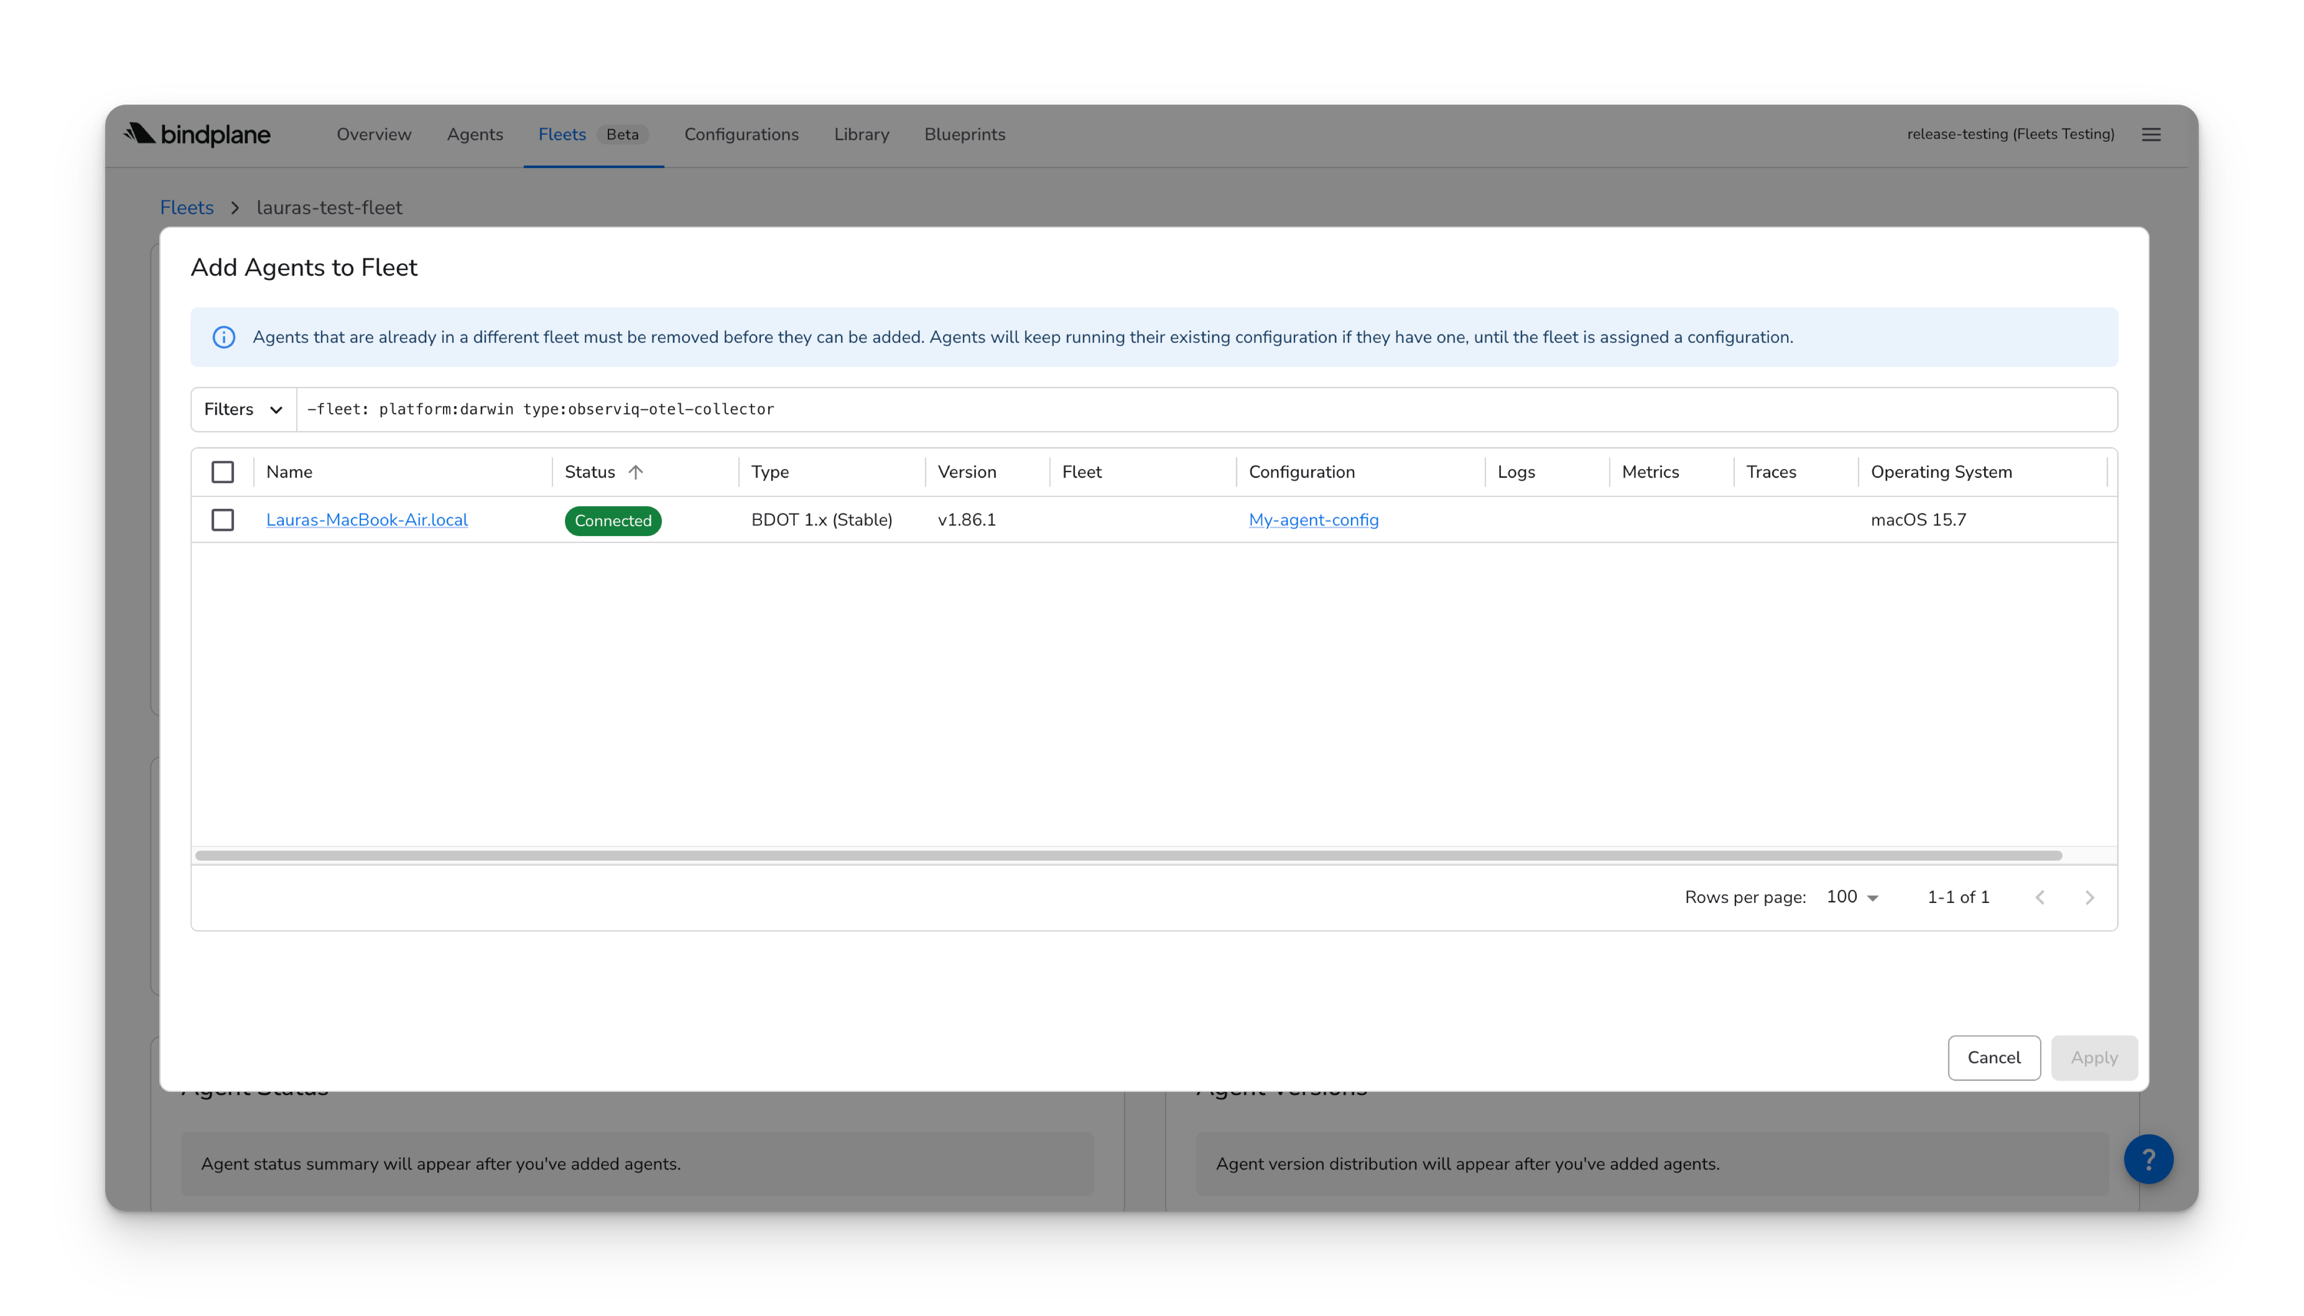
If an agent belongs to another fleet, it must be removed from the original fleet before adding it to a new one. An agent cannot belong to more than one fleet at a time.
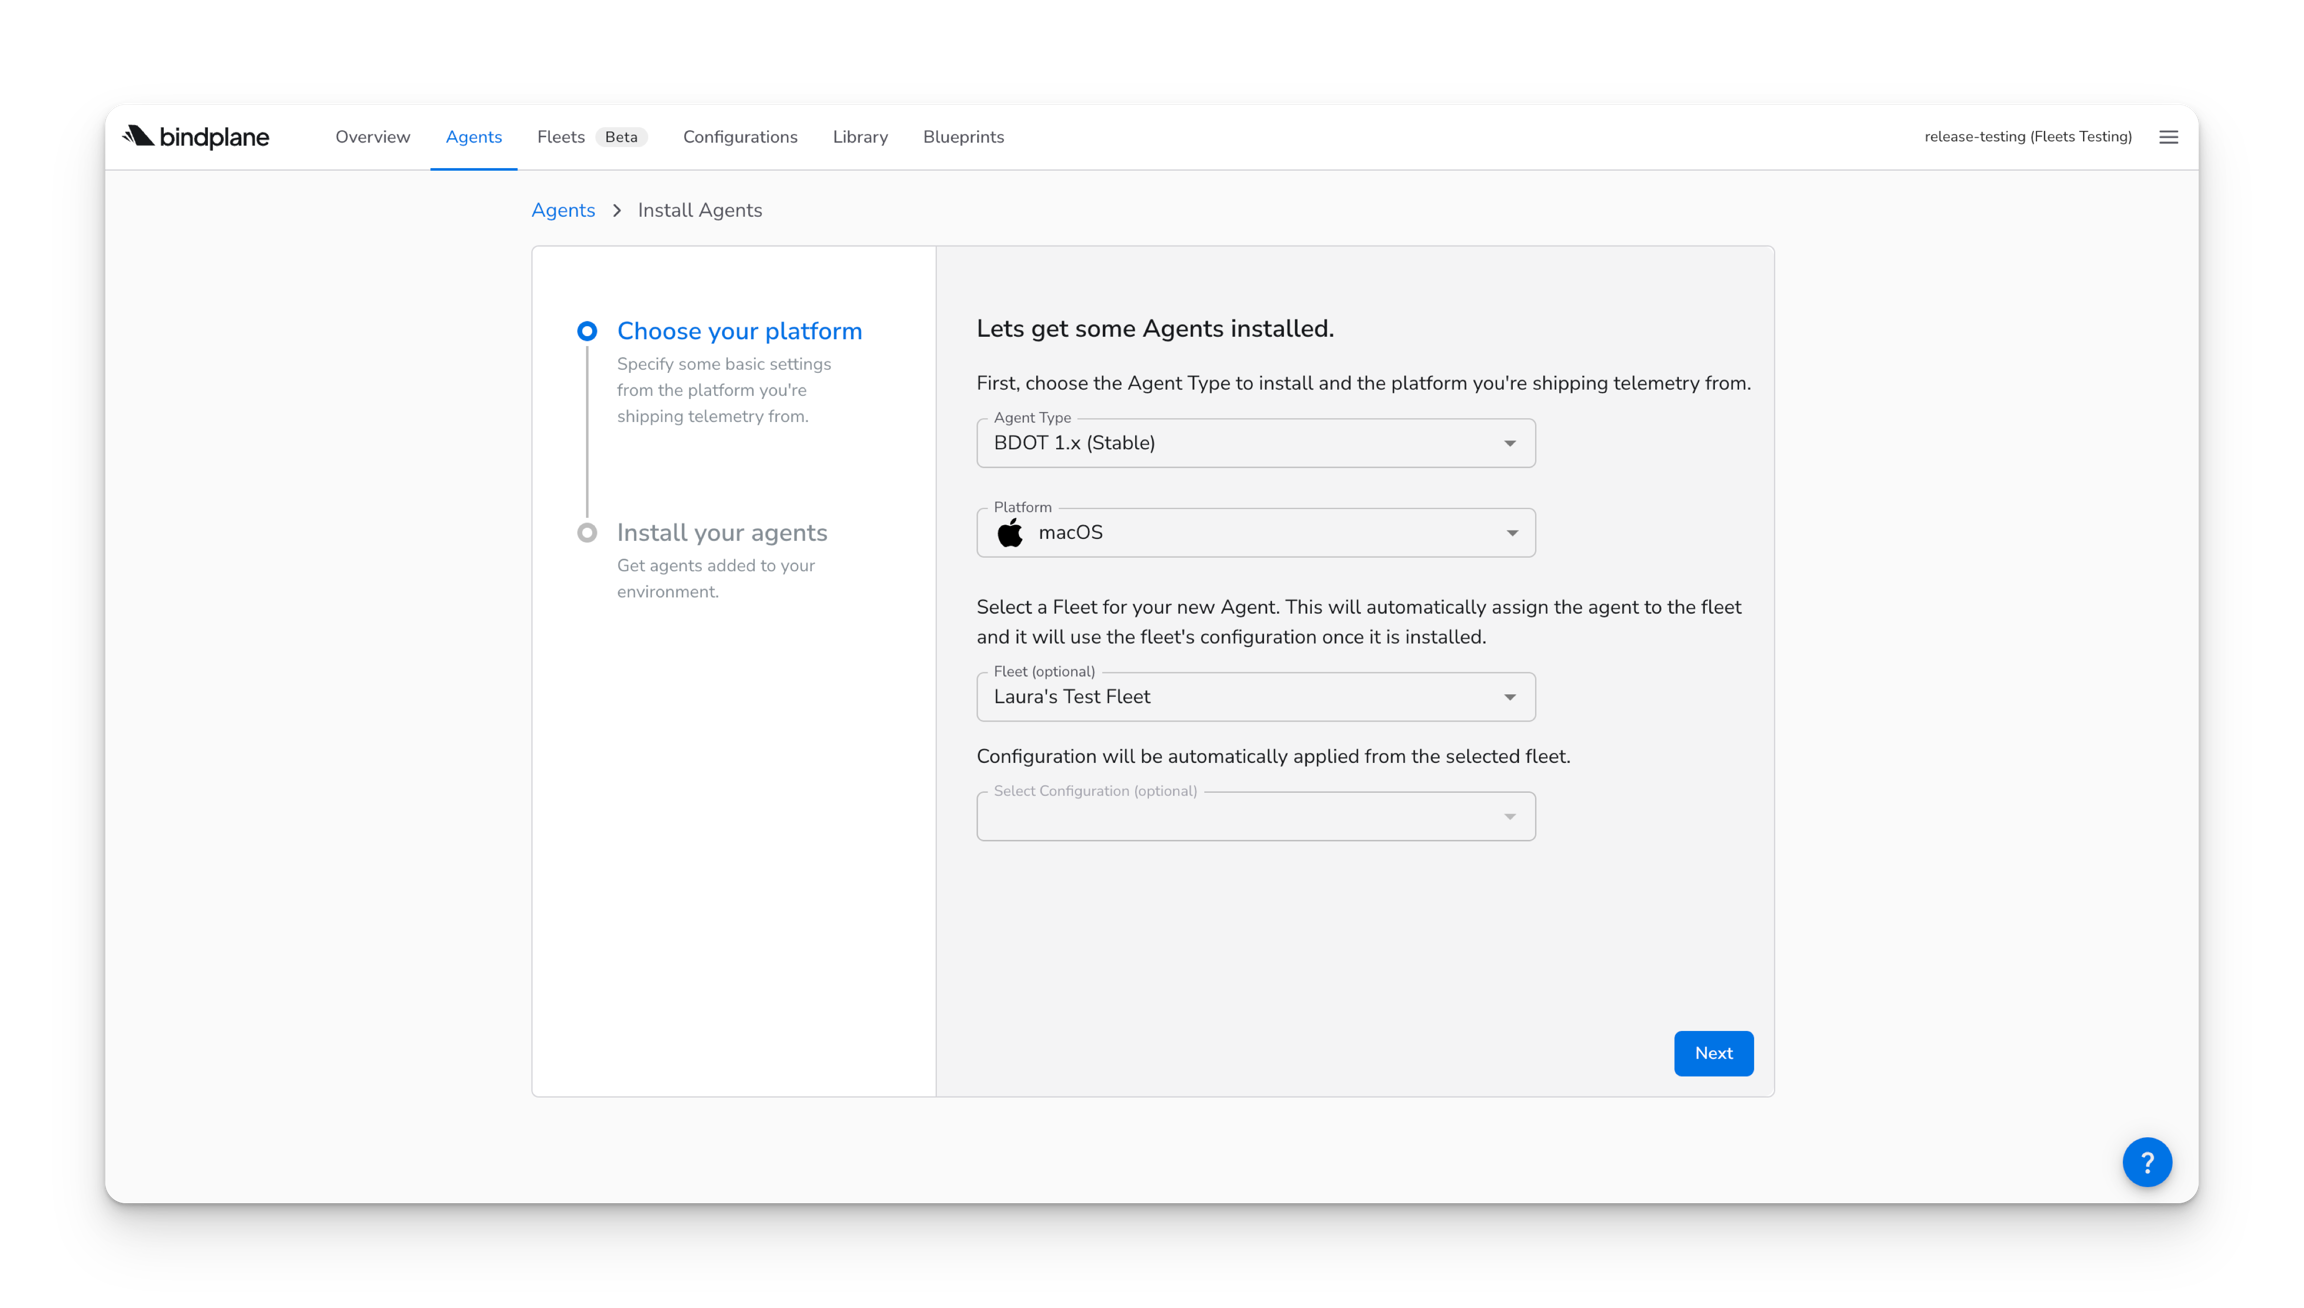
Fleets may also be assigned when installing a new agent.
CLI
Optionally, you can add an agent to a fleet through the CLI by assigning the fleet label to the agent.
Assigning a Config to a Fleet
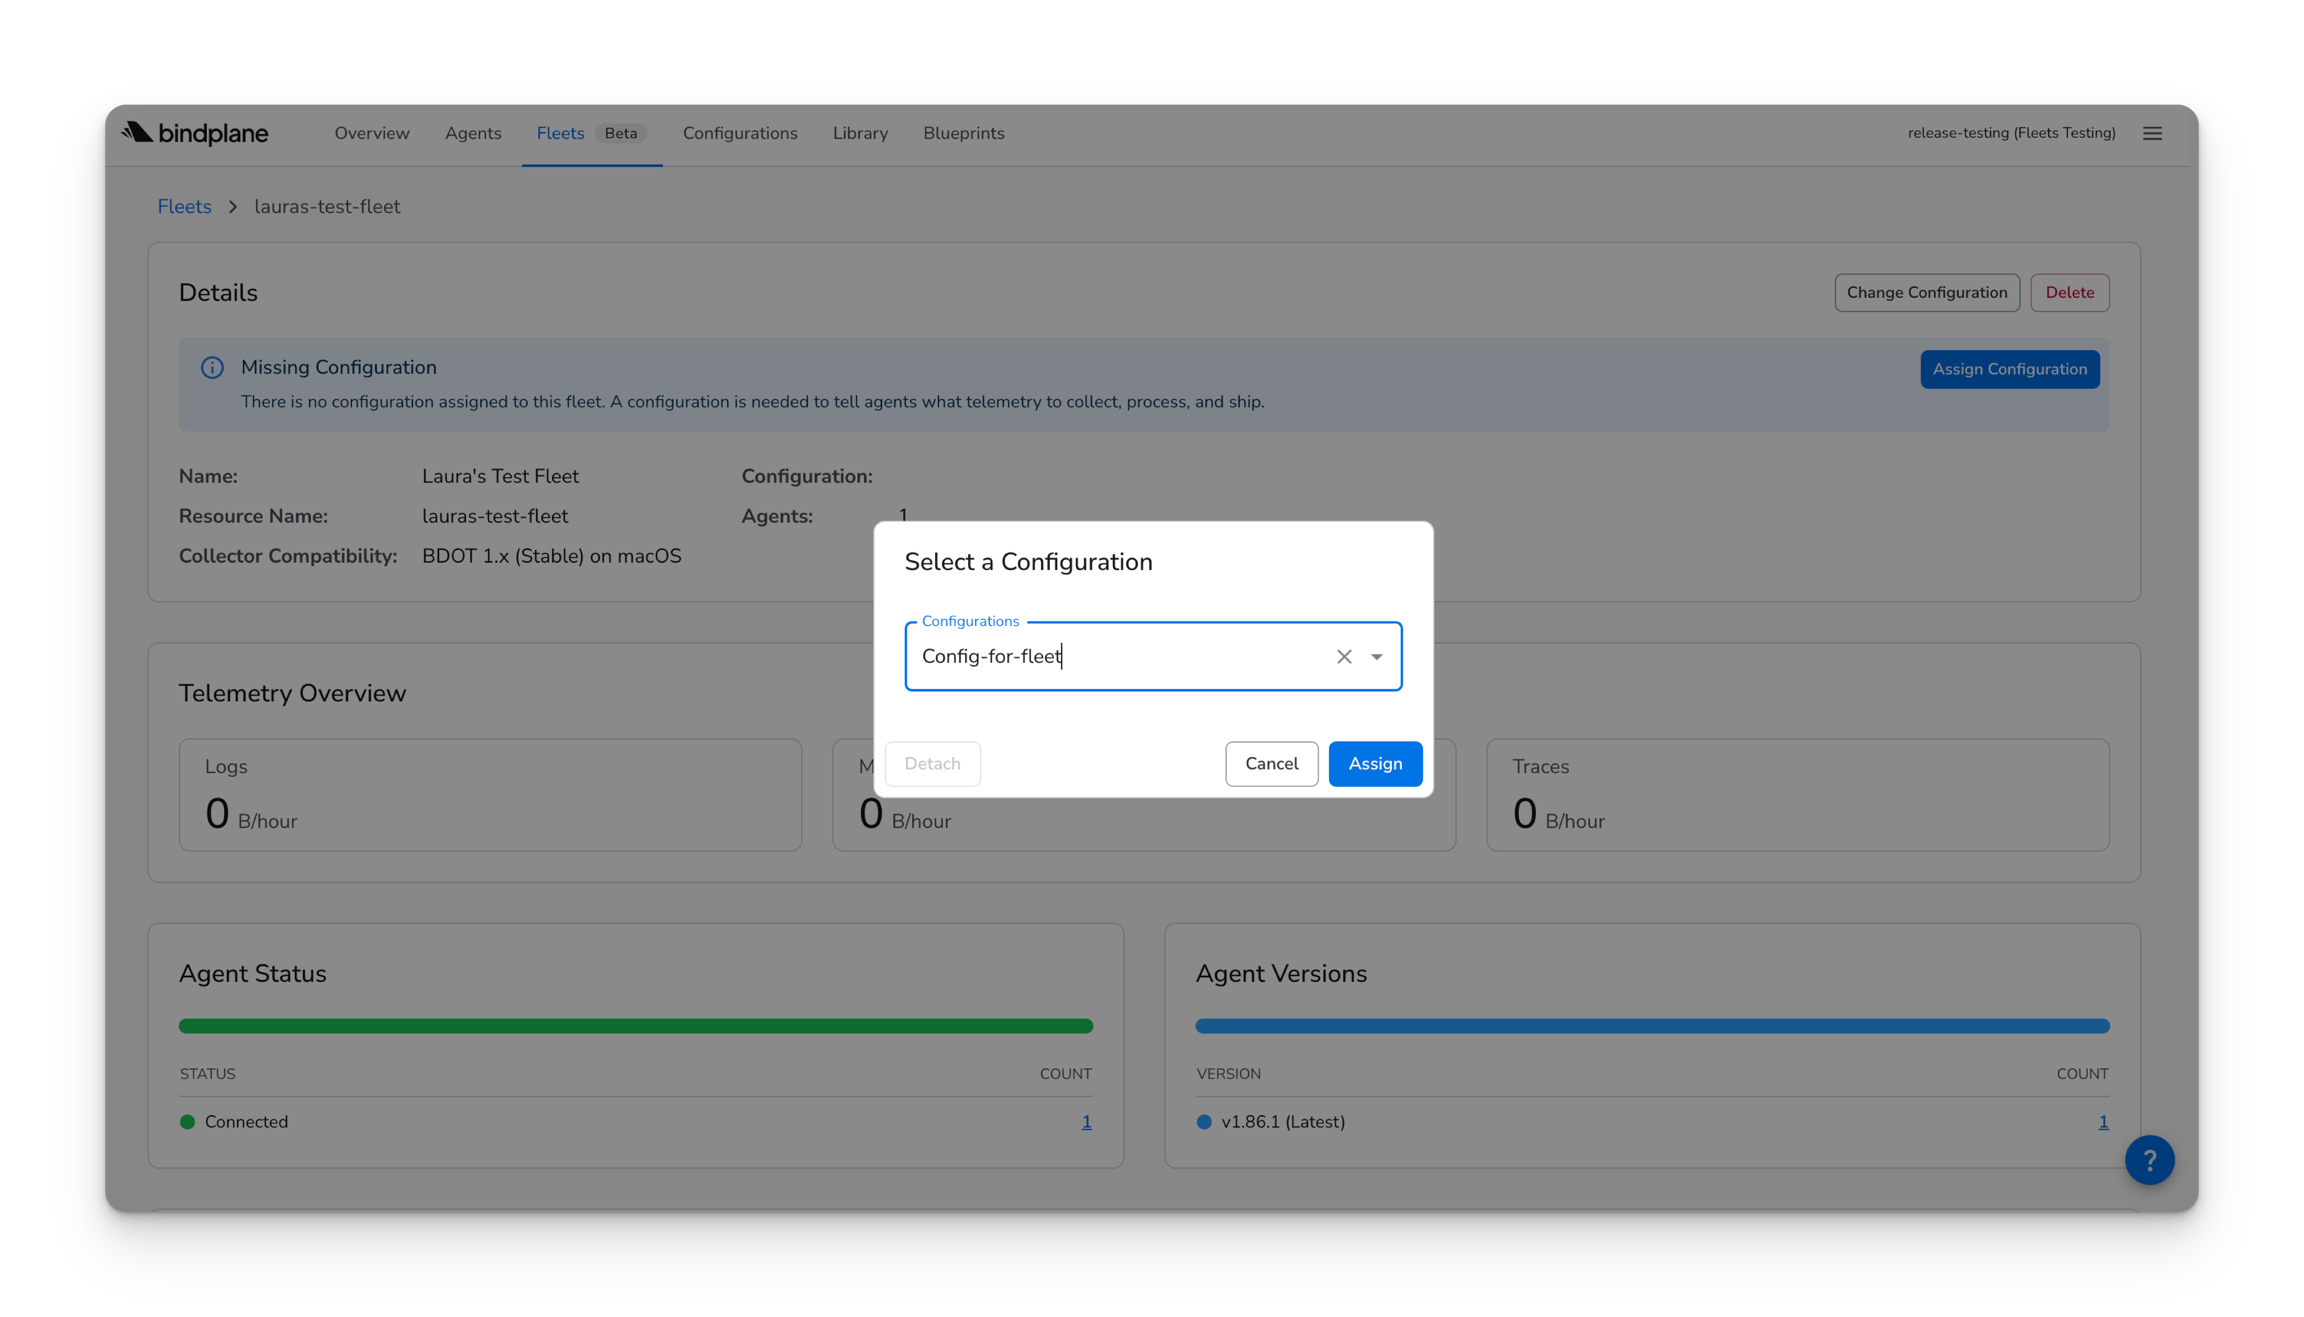
On the fleet page, choose Assign Configuration, and select your configuration. All agents in the fleet will inherit the fleet configuration and use it immediately, if the configuration has been rolled out.
Ensure your fleet’s configuration has been rolled out. Until then, agents will continue to run on their individual configurations, if they exist.
To change the Fleet's configuration, choose Change Configuration and select the new config.
CLI
Optionally, you can assign a config to a fleet through the CLI by updating the YAML file with the new configuration name.
Fleet Health & Metrics
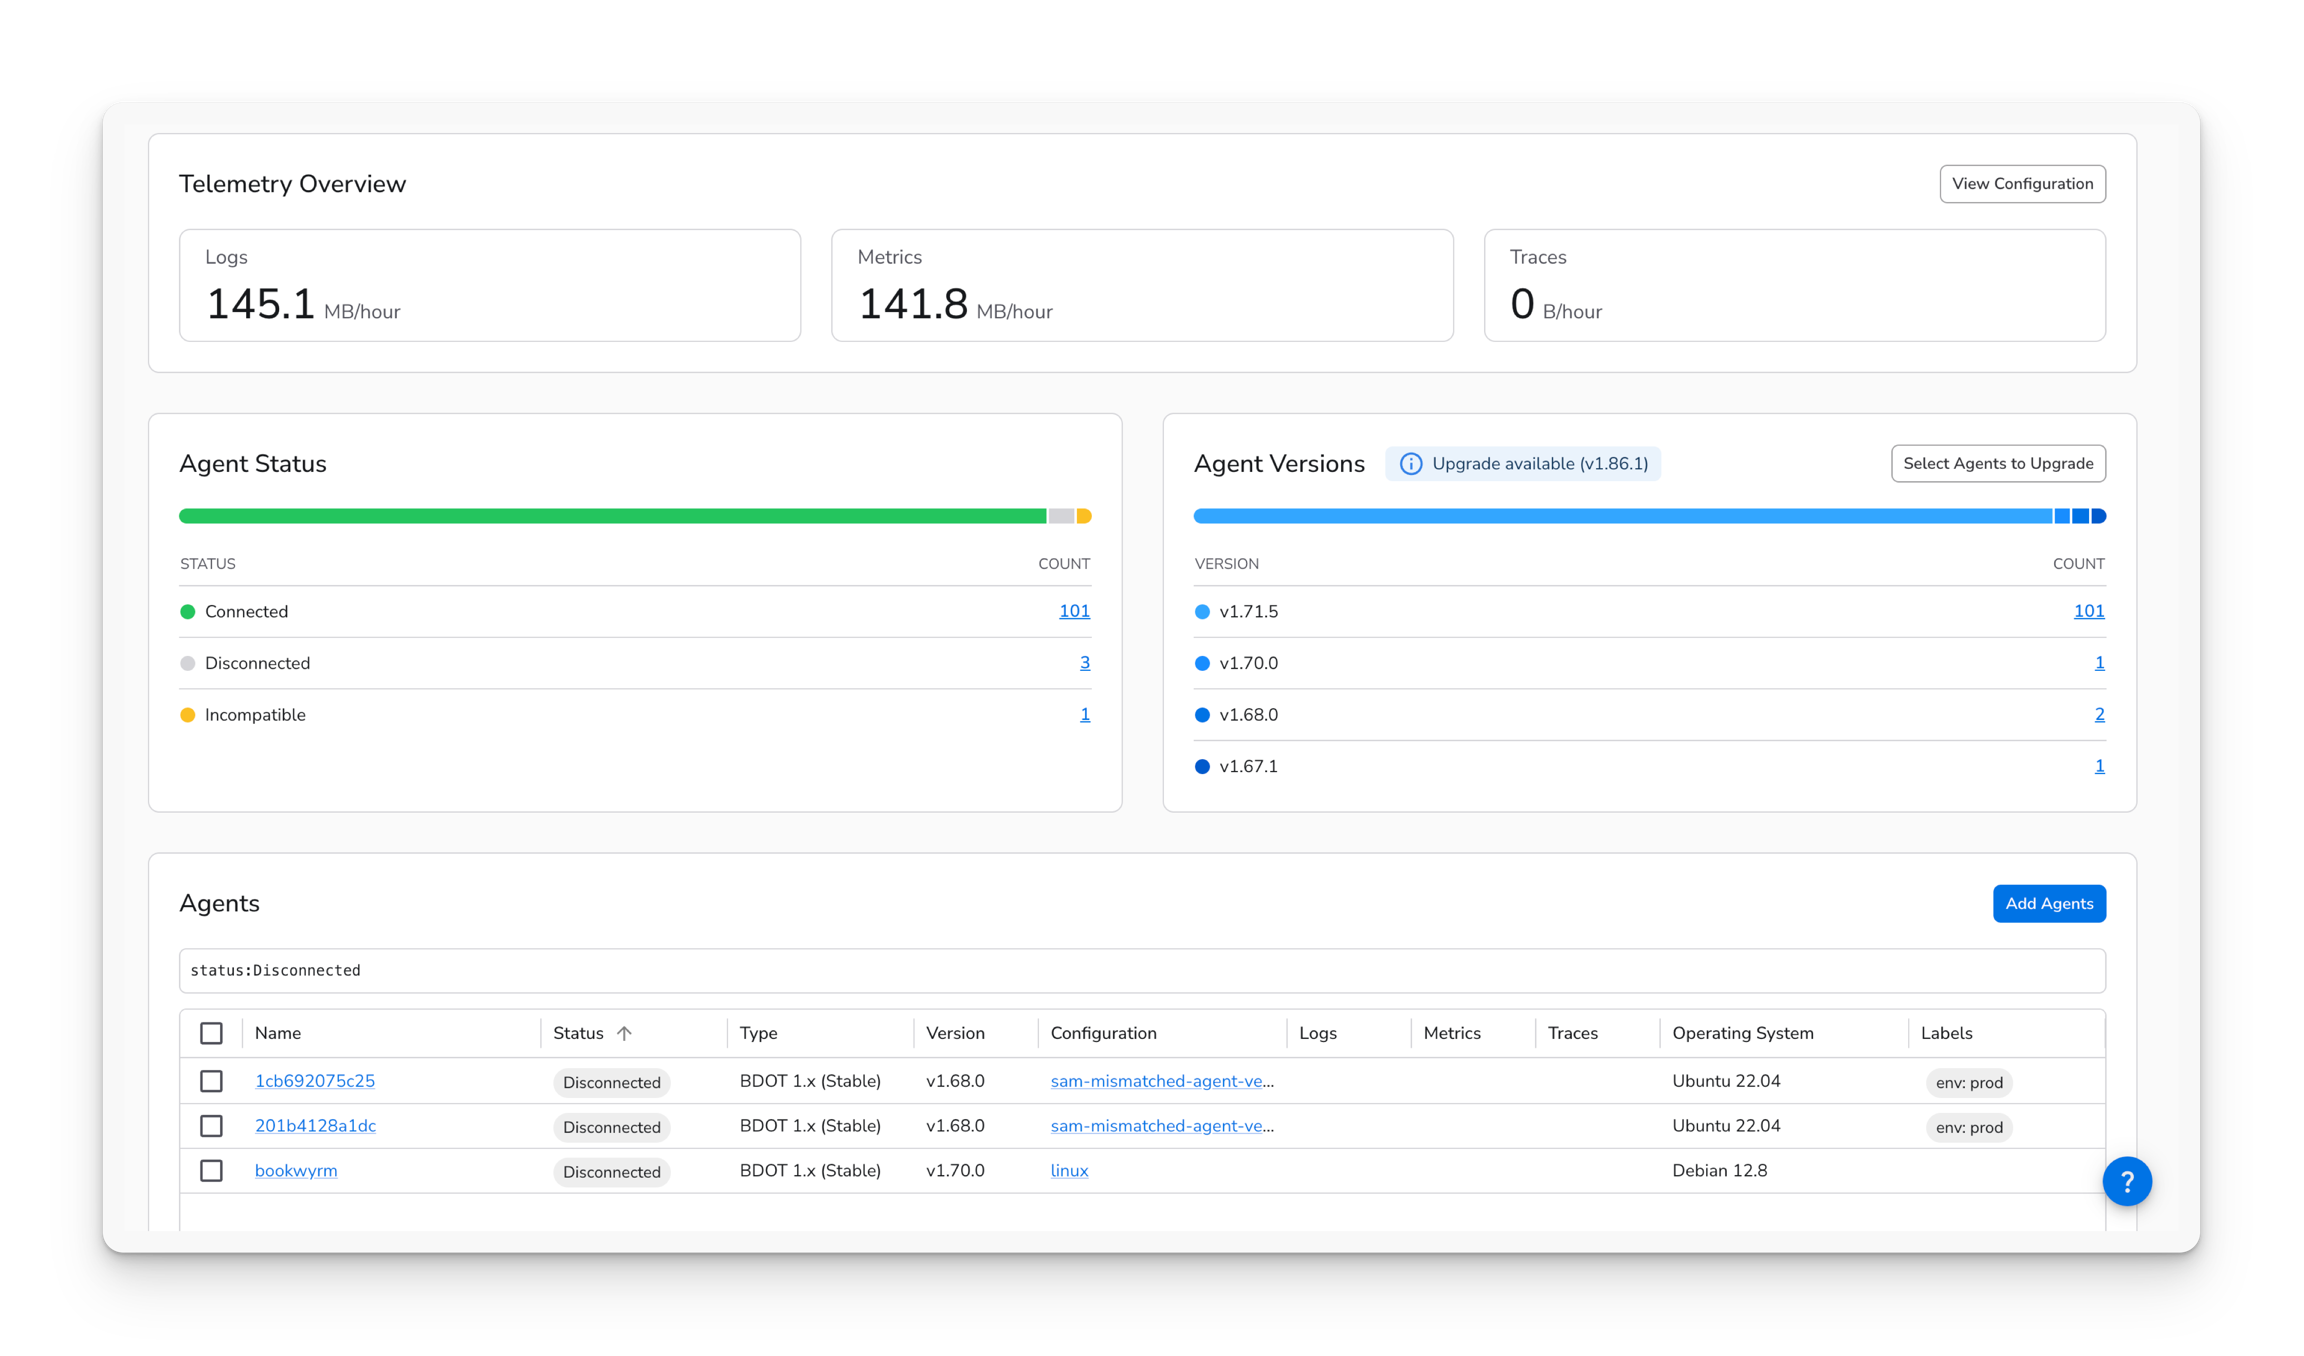
The Fleet page includes agent health and telemetry insights to help you understand the overall state of your fleet.
The Telemetry Overview section displays hourly throughput for logs, metrics, and traces. Below this, you’ll find Agent Status and Agent Version tables, which show a breakdown of agents by status and version. Clicking any status or version count will filter the agent table, allowing you to quickly focus on agents with that specific status or version. To clear the filter and view all agents assigned to the fleet, remove the text in the Agents search bar.
Removing Agents from a Fleet
From the Fleet page, select the agents you'd like to remove, choose Remove Agents , and confirm.
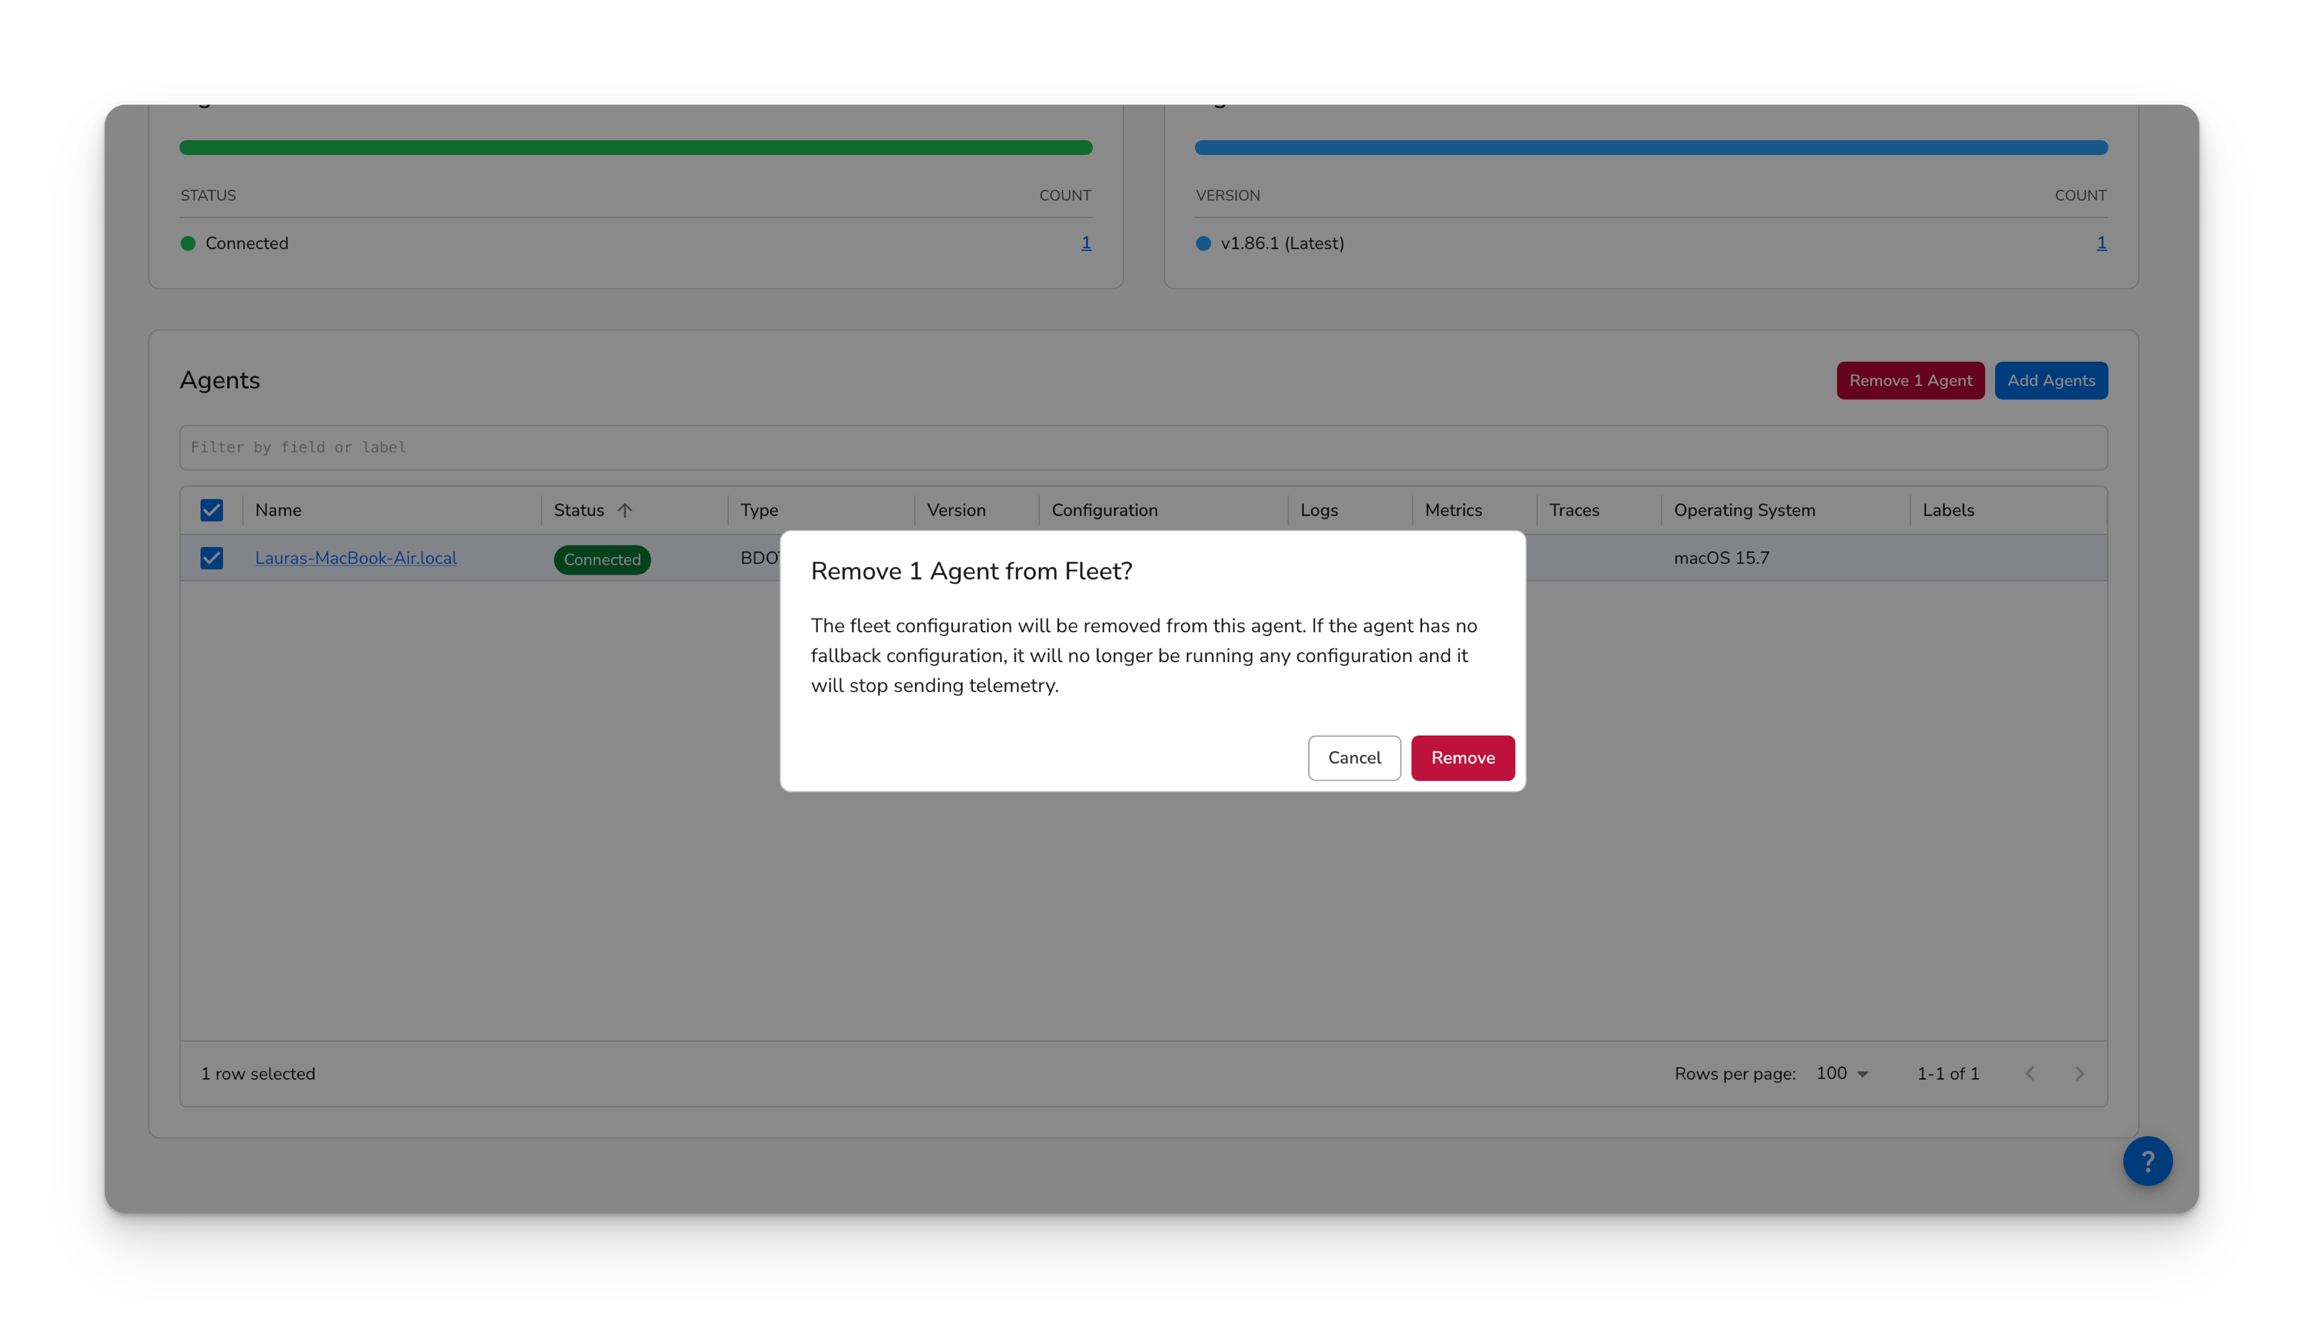
When an agent is removed from a fleet, it will revert to the configuration it was previously assigned (its individual configuration label, if one exists).
If no previous configuration is available, the agent will receive an empty configuration that does nothing.
You can change an agent’s individual configuration label at any time using the Change Configuration button on the Agent page. If you update this label while the agent is assigned to a fleet, that new configuration becomes its fallback once the agent is removed from the fleet.
CLI
Optionally, you can remove an agent from a fleet through the CLI by removing the fleet label from the agent.
Deleting a Fleet
On the fleet page, choose Delete and confirm.
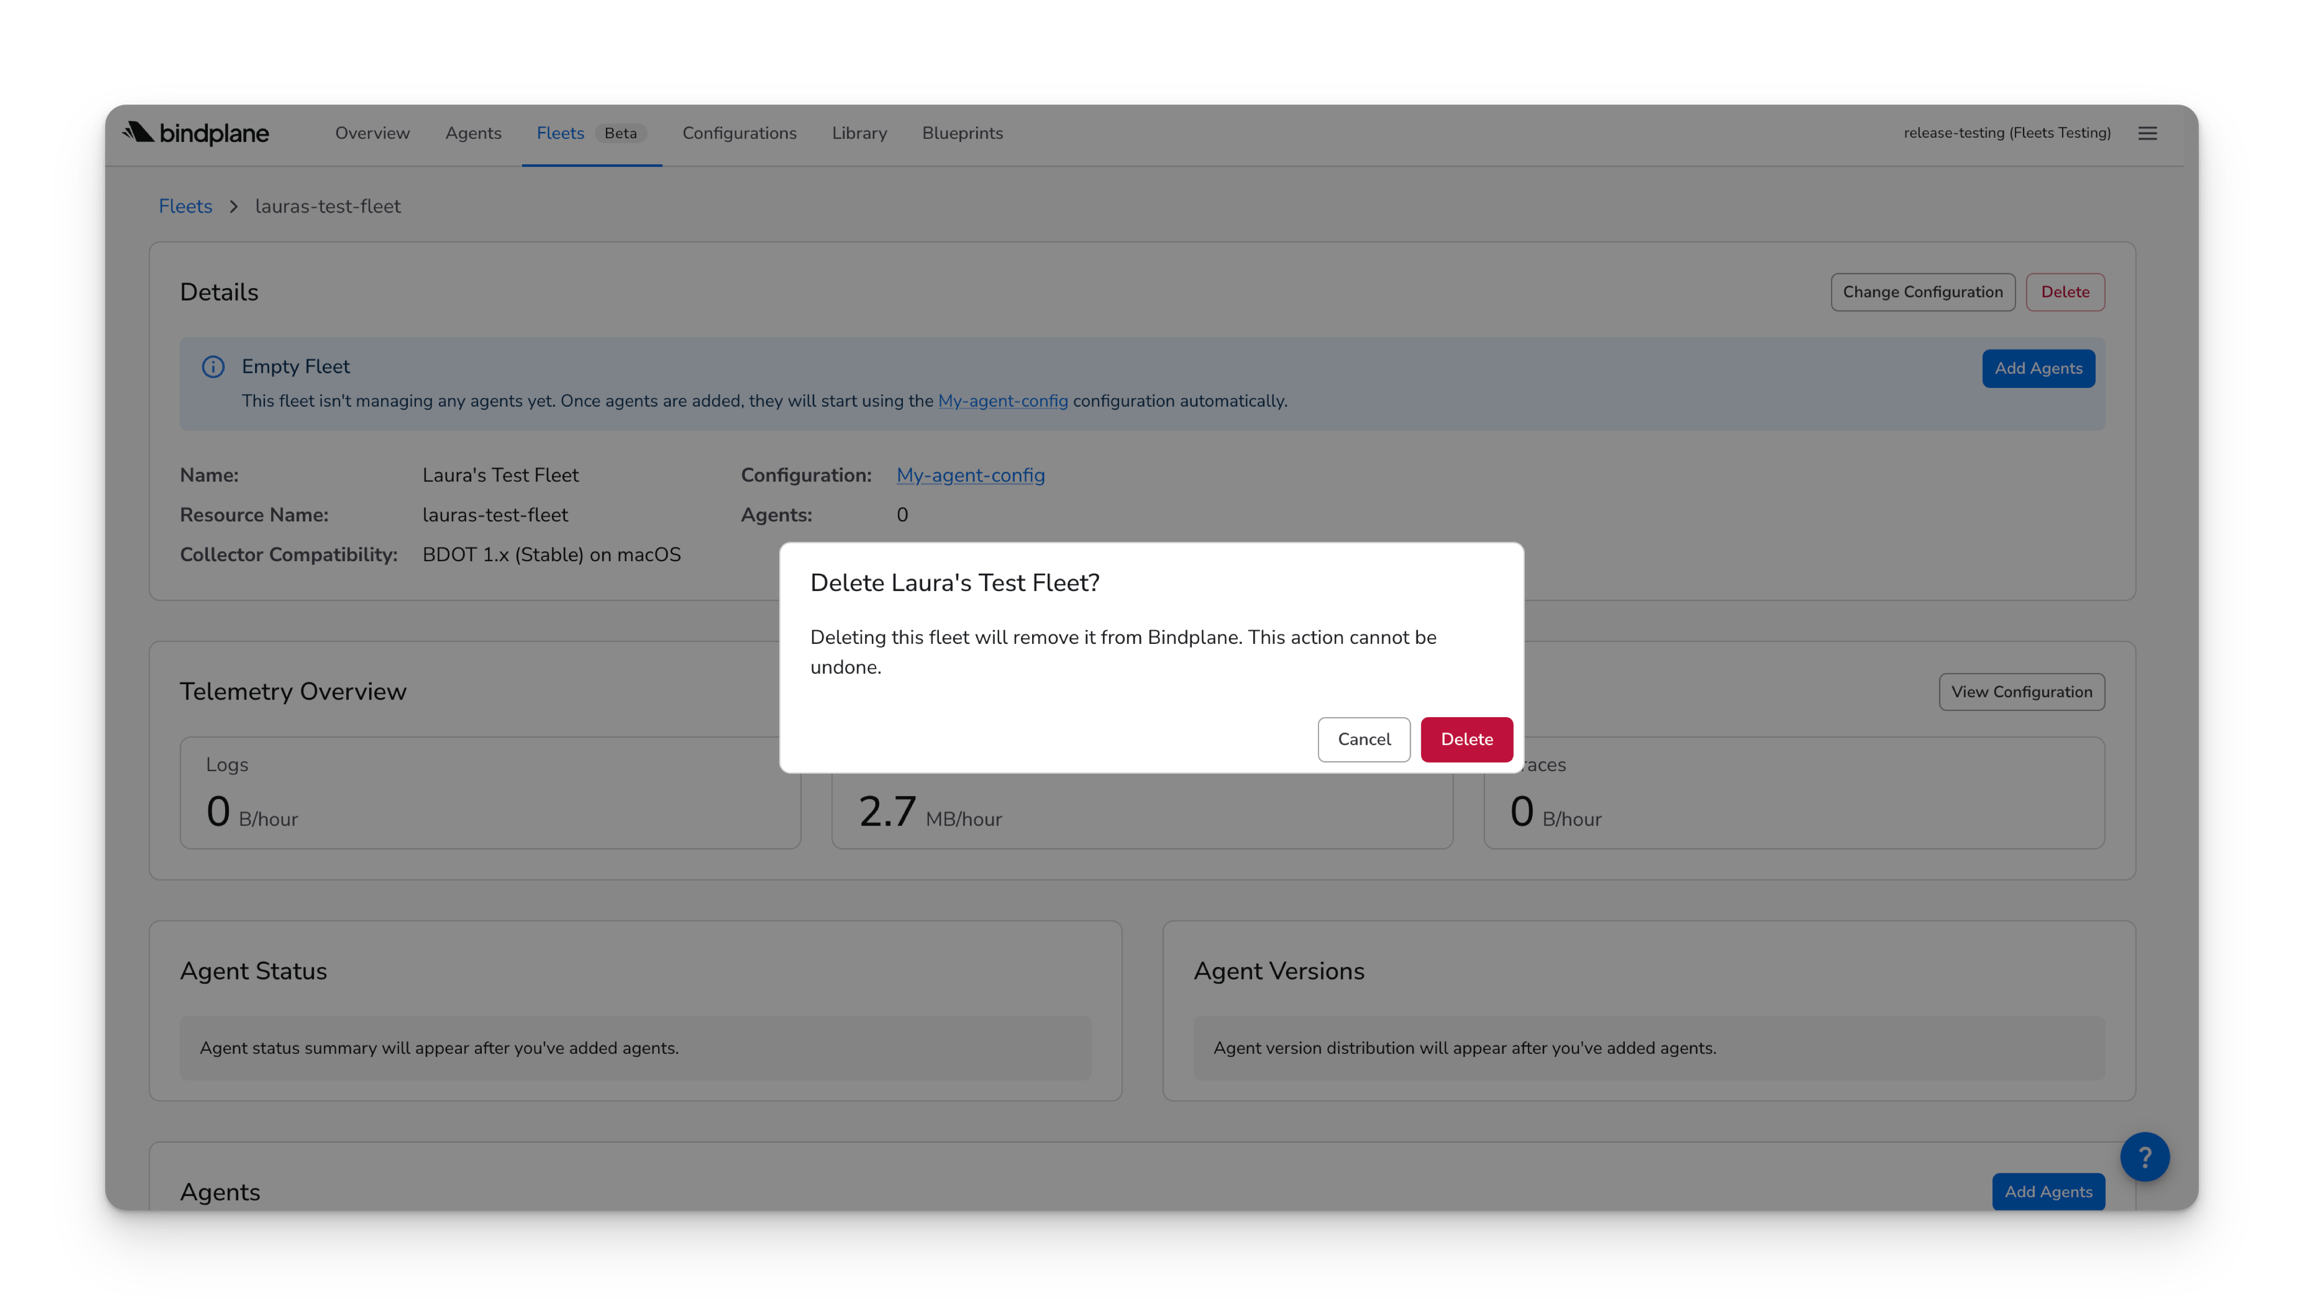
All agents must be removed from the fleet before the fleet can be deleted.
CLI
Optionally, you can delete the fleet through the CLI.
Was this helpful?