# Multi-Node Architecture on Google Cloud
Google Cloud can be used to host a scalable Bindplane architecture by leveraging multiple Bindplane instances in combination with Compute Engine, Cloud Load Balancer, and Pub/Sub.
### Prerequisites
The following requirements must be met:
* You must have access to a [Google Cloud Project](https://cloud.google.com/resource-manager/docs/creating-managing-projects)
* You must have a Bindplane [Enterprise or Google license](https://bindplane.com/solutions/)
* You must be comfortable working with the following Google services
* [Compute Engine](https://cloud.google.com/compute)
* [Cloud Load Balancer](https://cloud.google.com/load-balancing/docs/load-balancing-overview)
* [Pub/Sub](https://cloud.google.com/pubsub)
### Architecture
See the [High Availability](https://docs.bindplane.com/how-to-guides/broken-reference) documentation for details on the architecture that is used in this guide.
### Deployment
#### Firewall
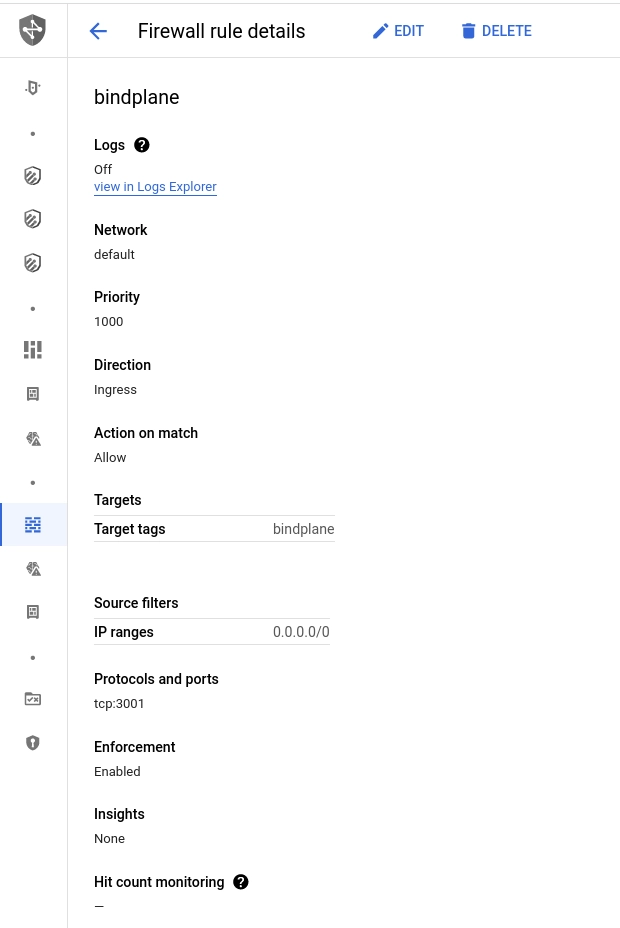
Create a firewall rule that will allow connections to Bindplane on TCP/3001.
* Name: `bindplane`
* Target Tags: `bindplane`
* Source Filters:
* IP ranges: `0.0.0.0`\*.
* Protocols and Ports: `TCP/3001`
\*Allowing access from all IP ranges will allow **anyone** on the internet access to Bindplane. This firewall rule should be restricted to allow access only from networks you trust.
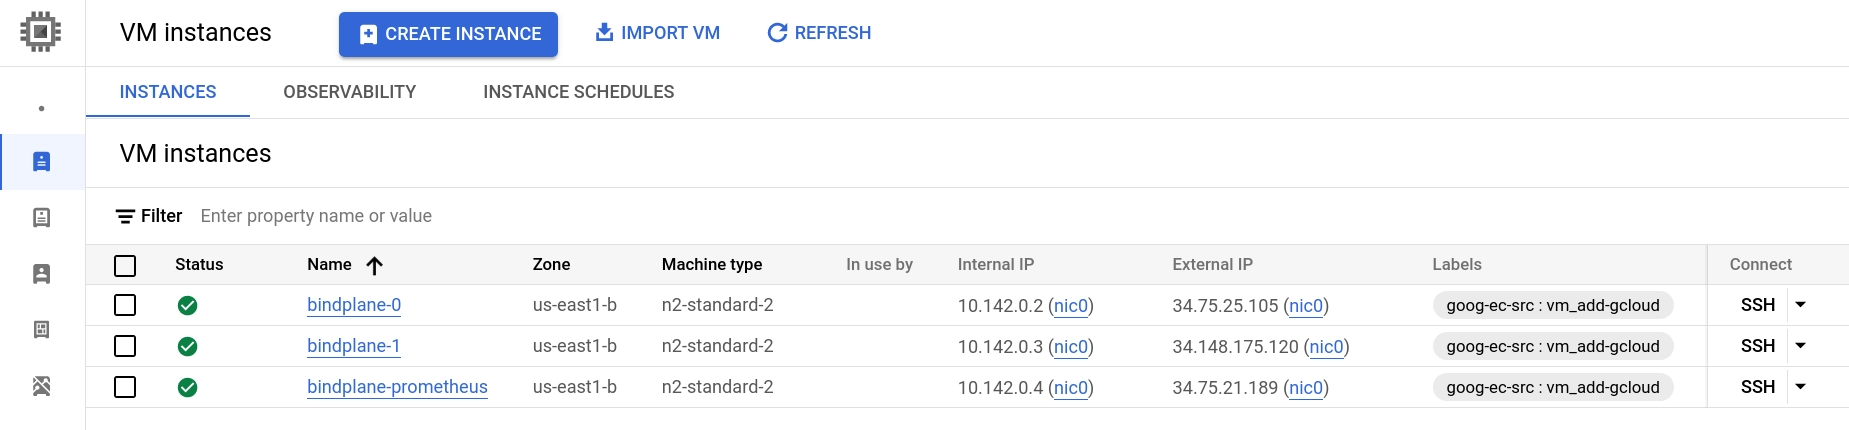
#### Compute Engine
In this guide, we will create three compute instances, `bindplane-0`, `bindplane-1`, and `bindplane-prometheus`. See the [prerequisites](https://docs.bindplane.com/how-to-guides/broken-reference) for information on individually sizing your instances.
We expect this deployment to handle 200 collectors, so we will select the `n2-standard-2` instance type, which has the exact core count required, and more than enough memory. We will use the same instance settings for Prometheus.
* 2 cores
* 8 GB memory
* 60 GB persistent ssd
For the Bindplane instances, use the following additional configuration.
* Static public IP addresses
* Scopes
* Set Cloud Platform to "enabled"
* Set pub/sub to "enabled"
* Network Tags: `bindplane`
#### Prometheus
Prometheus is used as a shared storage backend for Bindplane's collector throughput measurements. Connect to the `bindplane-prometheus` instance and follow our [Self-Managed Prometheus](https://docs.bindplane.com/how-to-guides/broken-reference) documentation.
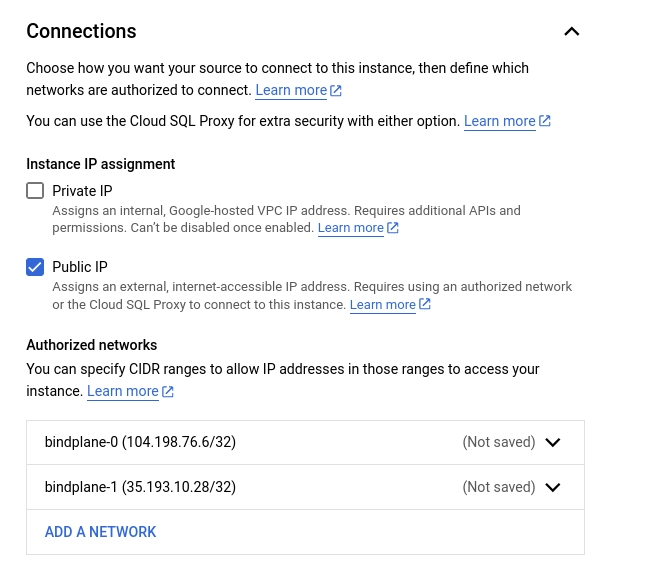
#### Cloud SQL
PostgreSQL is used as a shared storage backend for Bindplane. Google has many options available for production use cases, such as replication and private VPC peering.
**Deploy**
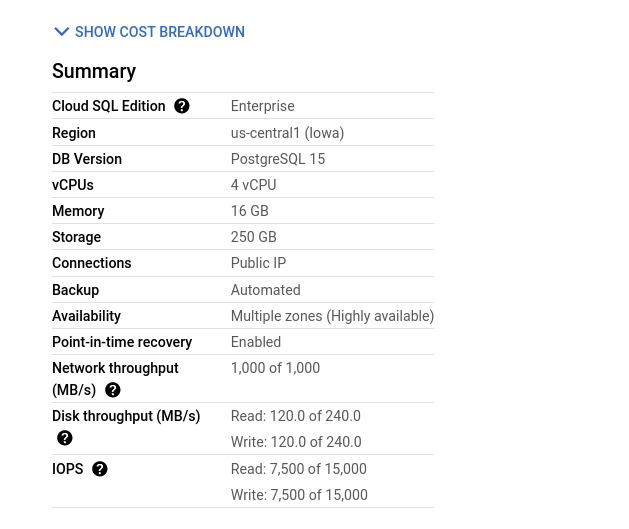
In this guide, we will deploy a basic configuration with:
* 4 cores
* 16GB memory
* 250GB SSD for storage
* Authorized Networks (Under "connections") set to the public IP addresses of the previously deployed compute instances
* If you would prefer to keep the CloudSQL instance off of the public internet, [Configure connectivity using VPC peering](https://cloud.google.com/database-migration/docs/postgres/configure-connectivity-vpc-peering)
All other options are left unconfirmed or set to their default values.
**Configure**
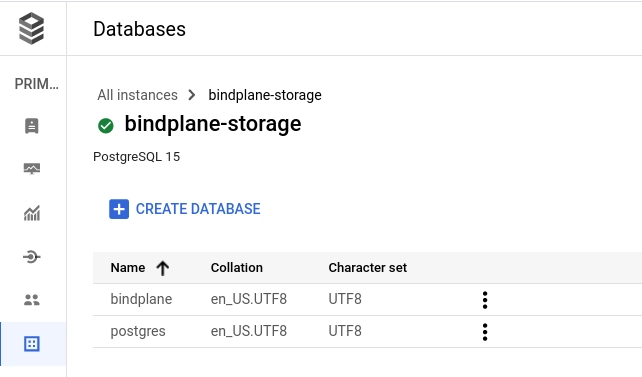
Once the Cloud SQL instance is deployed, we need to create a database and a database user.
On the database's page, select "create database" and name it `bindplane`.
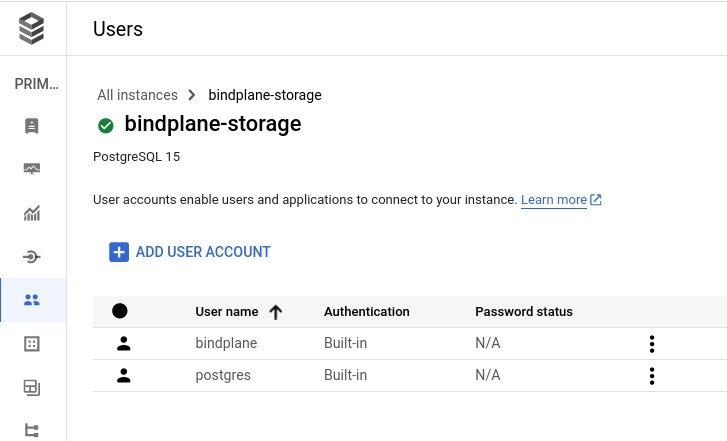
On the user's page, add a new user named `bindplane` and use a secure password, or choose the "generate password" option. Note the password, it will be required when Bindplane is configured.
#### Pub/Sub
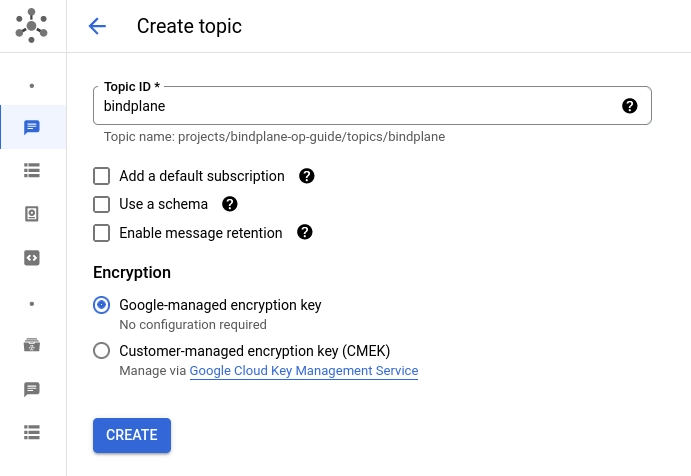
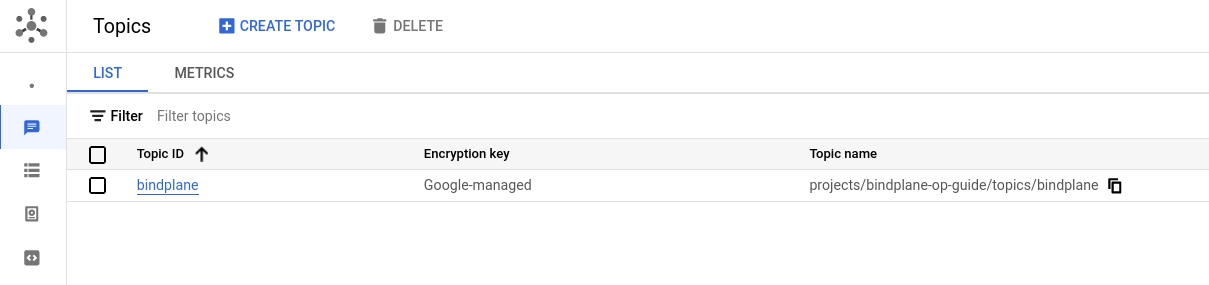
Google Pub/Sub is used by Bindplane to share information between instances. Create a new topic named `bindplane`. Uncheck the "add a default subscription" option. You can keep all other options set to their default value.
#### Cloud Load Balancer
In order to distribute connections between multiple Bindplane instances, a TCP load balancer is required. This guide will use an internet-facing load balancer, however, an internal load balancer is also supported.
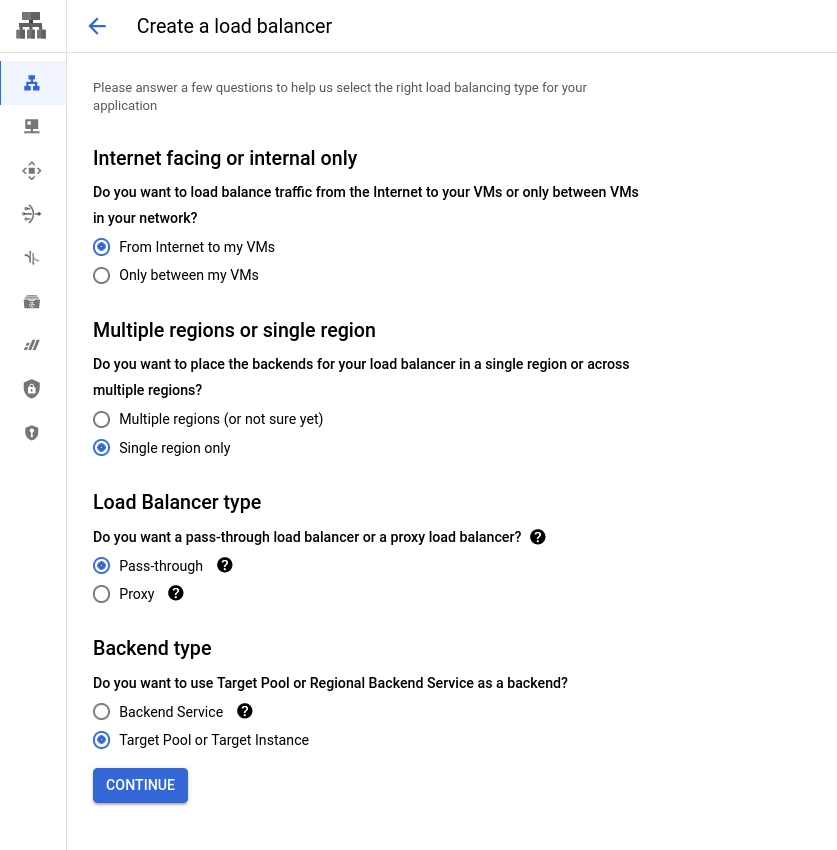
Create a load balancer with the following options:
* From the internet to my VMs
* Single region only
* Pass-through
* Target Pool or Target Instance
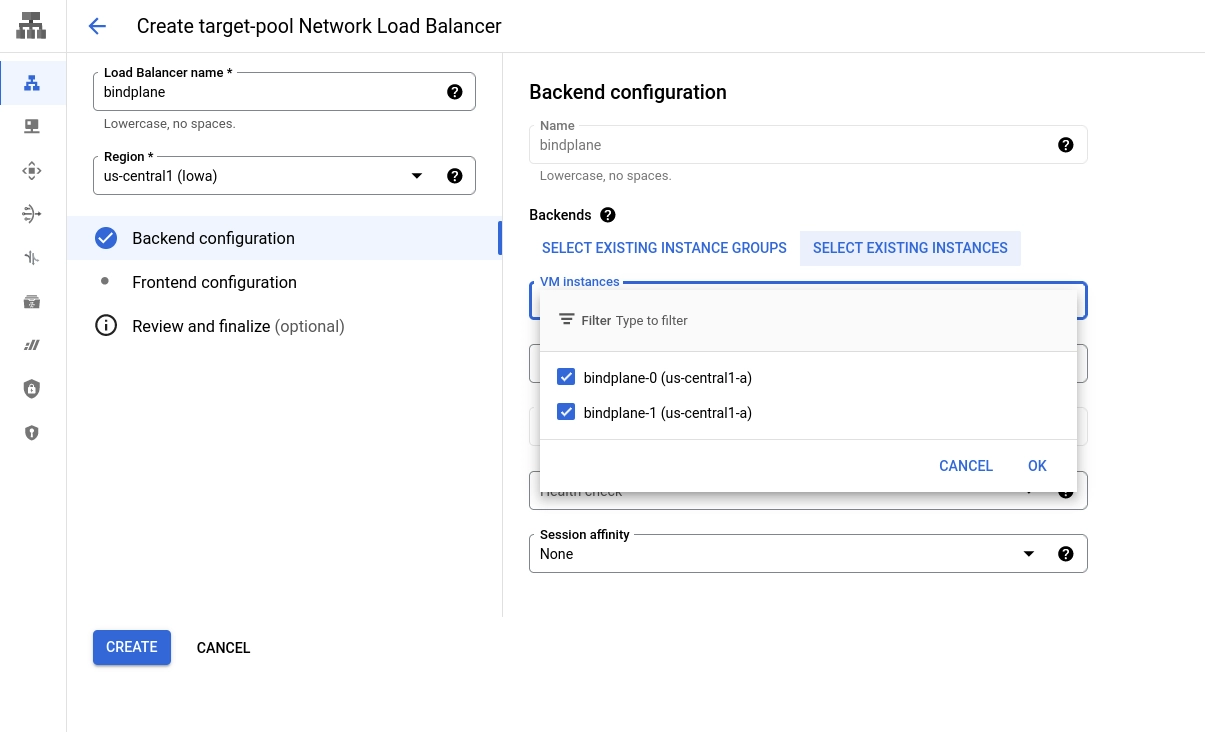
**Backend Configuration**
Configure the Backend with the following options:
* Name: `bindplane`
* Region: The region used for your compute instances, pub/sub topic, and CloudSQL instance
* Backends: "Select Existing Instances"
* Select your Bindplane instances
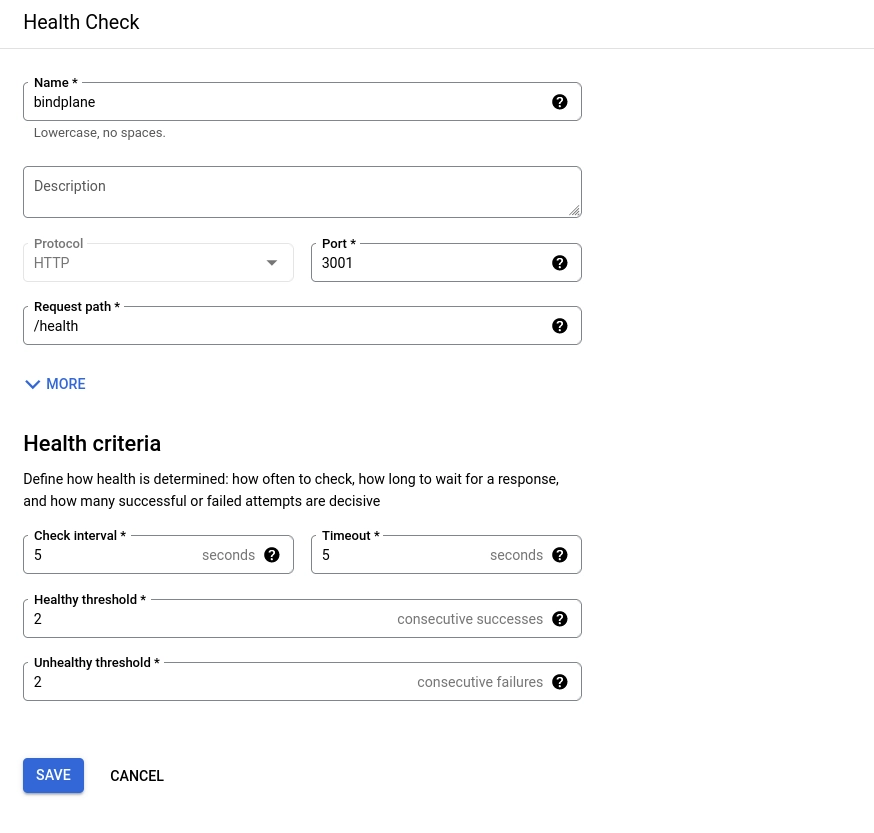
* Health check: Choose "Create new health check"
* Name: `bindplane`
* Protocol: `http`
* Port: `3001`
* Request Path: `/health`
* Health criteria: Use default values
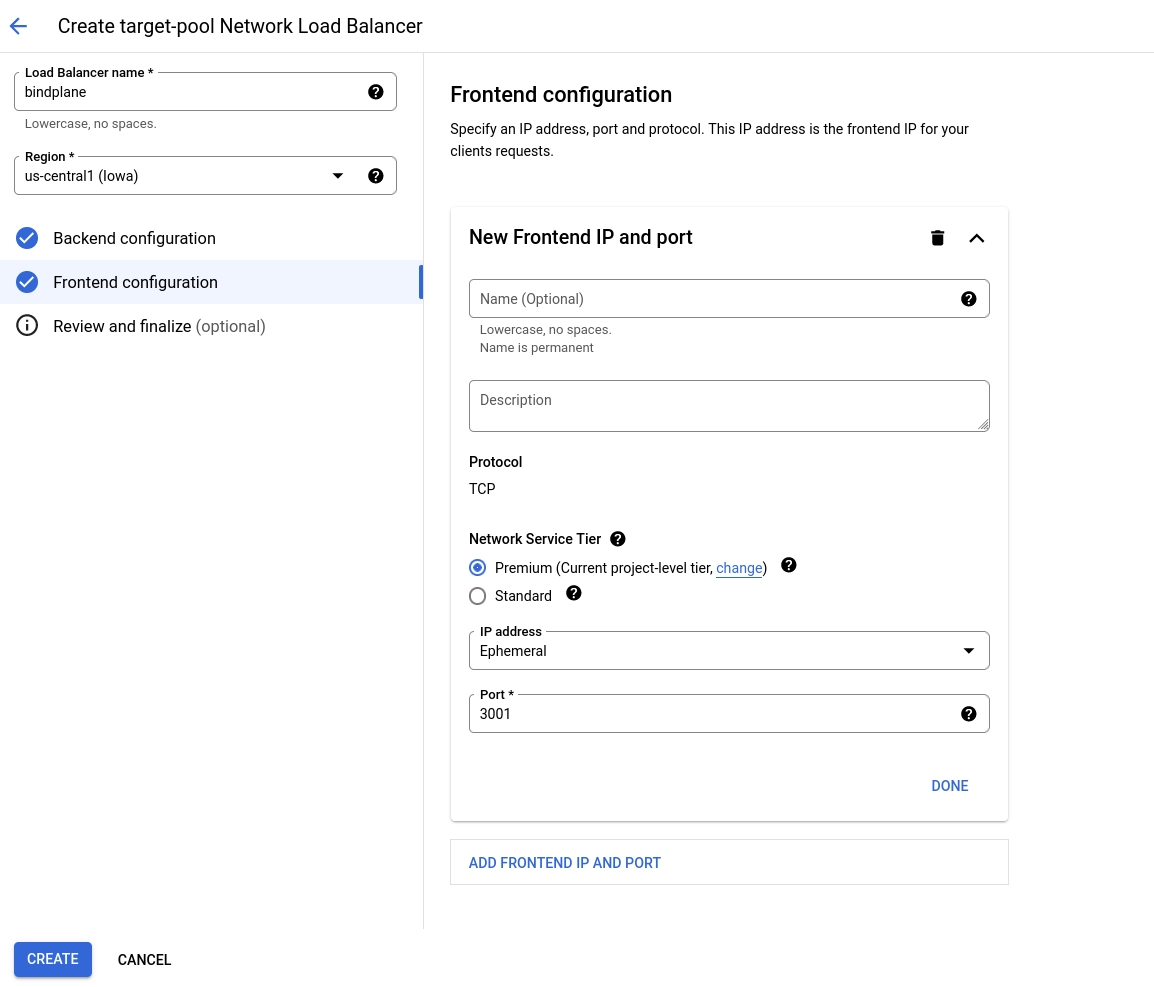
**Frontend Configuration**
Configure the Frontend with the following options:
* New Frontend IP and Port:
* Name: `bindplane`
* Port: `3001`
**Review and Create**
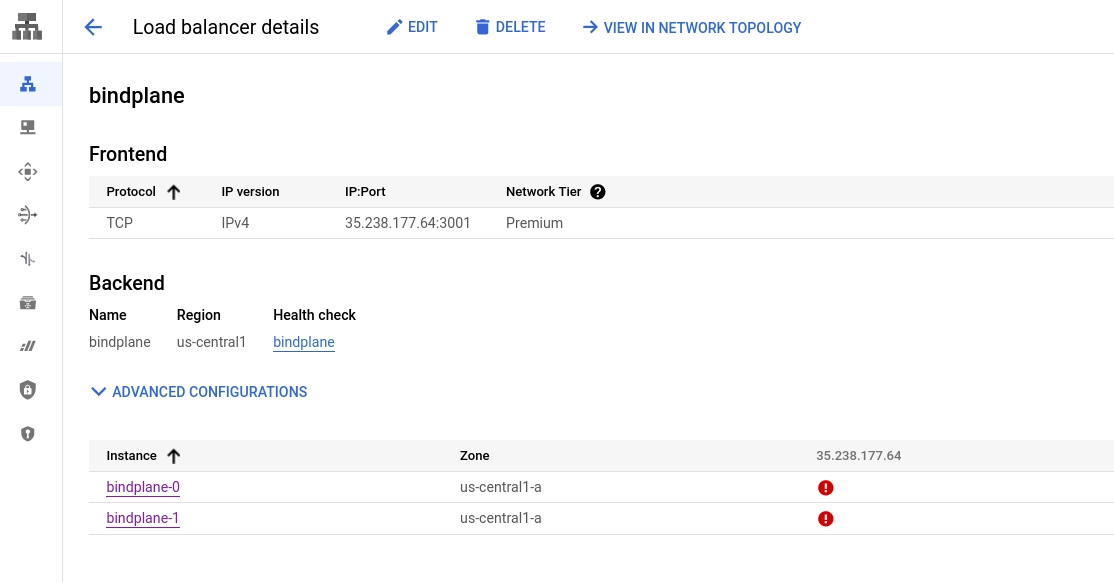
Review the configuration and choose "Create". Once created, the load balancer will exist and it should be failing the healthchecks, because Bindplane is not installed and configured yet.
### Install Bindplane
With Cloud SQL, Pub/Sub, and the load balancer configured, Bindplane can be installed on the previously deployed compute instances.
#### Install Script
Connect to both instances using SSH and issue the installation command:
```bash
curl -fsSlL https://storage.googleapis.com/bindplane-op-releases/bindplane/latest/install-linux.sh -o install-linux.sh && bash install-linux.sh && rm install-linux.sh
```
#### Initial Configuration
Once the script finishes, run the `init server` command on one of the instances. You will copy the\
generated configuration file to the second instance after configuring the first.
```bash
sudo BINDPLANE_CONFIG_HOME=/var/lib/bindplane /usr/local/bin/bindplane init server --config /etc/bindplane/config.yaml
```
1. License Key: Paste your license key.
2. Server Host: `0.0.0.0` to listen on all interfaces.
3. Server Port: `3001`
4. Remote URL: The IP address of your load balancer.
1. Example: `http://35.238.177.64:3001`
5. Enable Multi Project: Yes
6. Auth Type: Single User\*
7. Storage Type: `postgres`
8. Host: Public IP address of the CloudSQL instance.
9. Port: `5432`
10. Database Name: `bindplane`
11. SSL Mode: `require`
12. Maximum Number of Database Connections: `100`
13. PostgreSQL Username: `bindplane`
14. PostgreSQL Password: The password you configured during the CloudSQL setup.
15. Event Bus Type: `Google PubSub`
16. PubSub Project ID: Your Google project id
17. PubSub Credentials File: Leave this blank, authentication will be handled automatically.
18. PubSub Topic: `bindplane`
19. PubSub Subscription: Leave blank, subscriptions will be managed by each Bindplane instance.
20. Accept Eula: Choose yes if you agree.
21. Restart the server?: `no`
{% hint style="info" %}
**NOTE**
📘 You can select LDAP or Active Directory if you do not wish to use basic auth. This guide's scope will not cover external authentication.
{% endhint %}
Copy the contents from the file `/etc/bindplane/config.yaml` to the same location on the second instance. This will ensure both instances have an identical configuration. Specifically, both instances require the same value for `auth.sessionSecret`.
#### Configure Remote Prometheus
Bindplane uses Prometheus to store collector throughput metrics. When operating with multiple\
nodes, a shared Prometheus instance is required.
Stop Bindplane:
```bash
sudo systemctl stop bindplane
```
Open the configuration file with your favorite editor. Make sure to use `sudo` or the `root` user as the configuration file is owned by the `bindplane` system project.
```bash
sudo vim /etc/bindplane/config.yaml
```
Find the Prometheus section. It will look like this:
```yaml
prometheus:
localFolder: /var/lib/bindplane/prometheus
host: localhost
port: '9090'
remoteWrite:
endpoint: /api/v1/write
auth:
type: none
```
Make two changes.
1. Add `enableRemote: true`
2. Update `host: bindplane-prometheus`
The final configuration will look like this:
```yaml
prometheus:
enableRemote: true
localFolder: /var/lib/bindplane/prometheus
host: bindplane-prometheus
port: '9090'
remoteWrite:
endpoint: /api/v1/write
auth:
type: none
```
These changes will instruct Bindplane to use a remote Prometheus instance.
#### Start Bindplane
Restart all Bindplane instances in order to pickup the latest configuration.
```bash
sudo systemctl restart bindplane
sudo systemctl status bindplane
```
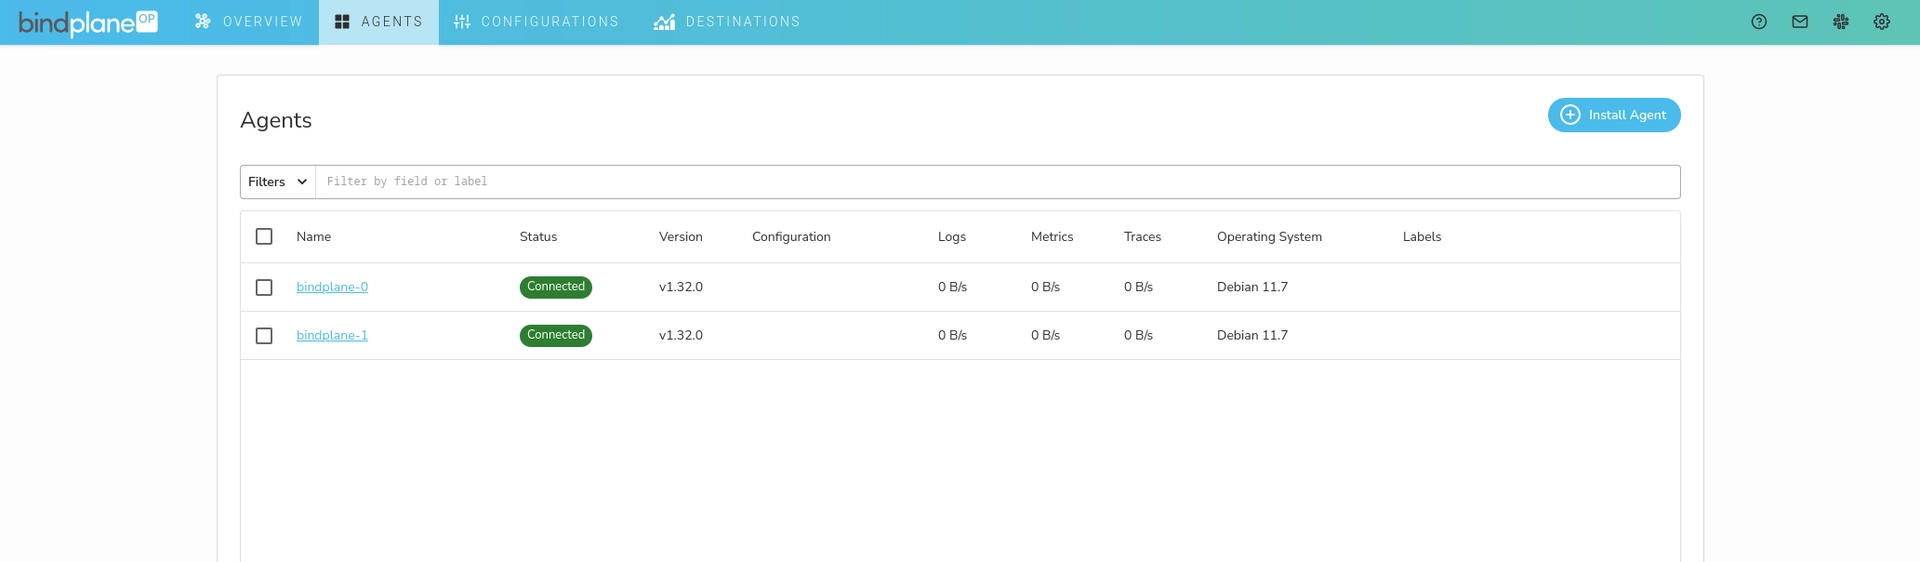
Once Bindplane starts, the Pub/Sub subscriptions are configured automatically:
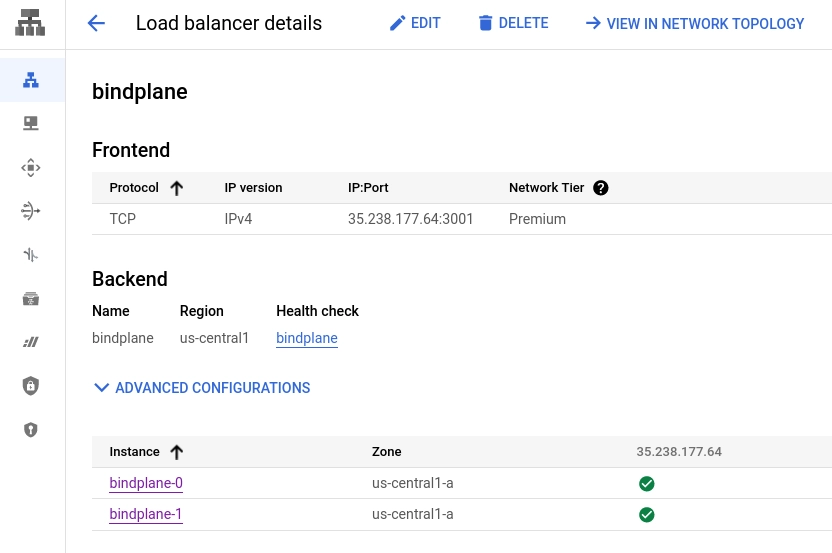
After a few moments, the load balancer healthchecks will begin to pass:
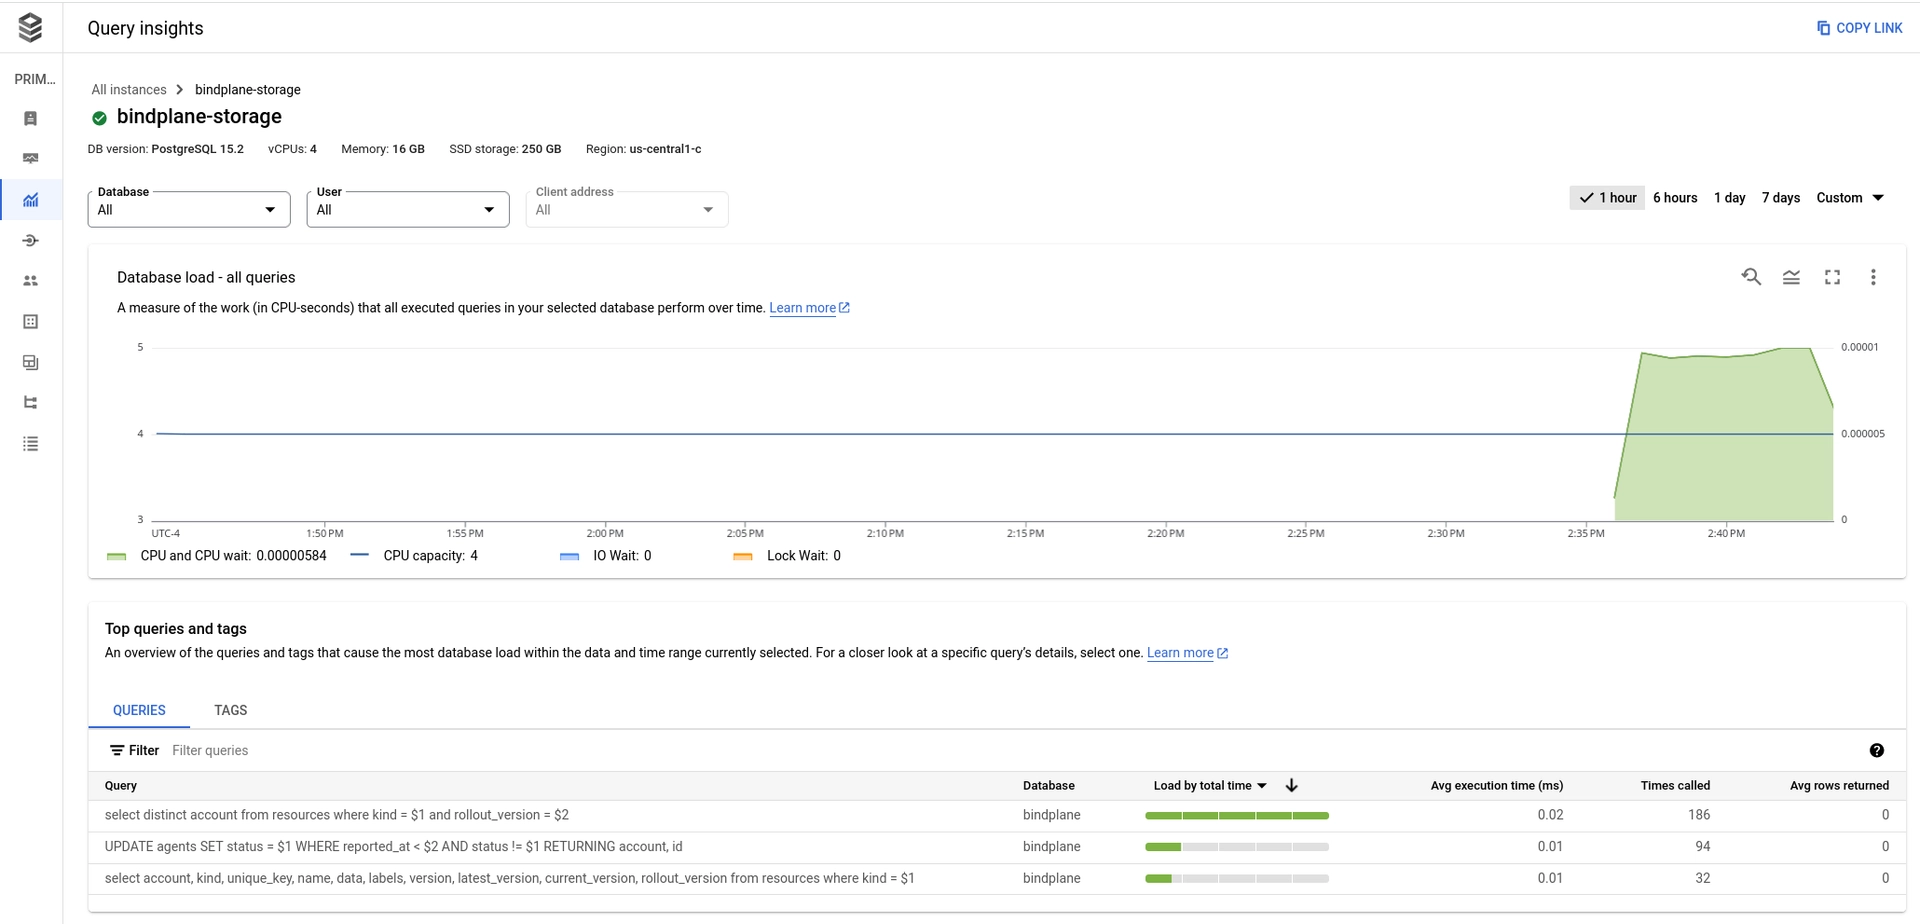
Cloud SQL activity can be monitored by enabling [Query Insights](https://cloud.google.com/sql/docs/postgres/using-query-insights).
### Use Bindplane
#### Connect to Bindplane
Browse to `http://:3001` and sign into the Bindplane installation using\
the username and password you used during the configuration step.
#### Install Collectors
On the collectors page, choose "Install Collector" and inspect the installation command. The `-e` flag should be set to the load balancer address. If it is not, this indicates a misconfiguration in Bindplane's `remoteURL` configuration option in `/etc/bindplane/config.yaml`.
To quickly test, deploy a collector to each of the Bindplane compute instances.